Template:Scenario: Difference between revisions
Jump to navigation
Jump to search
No edit summary |
m (Clean up usage info (TODO: Finish filling out example)) |
||
| Line 17: | Line 17: | ||
* [[List of maps (HotA)]] | * [[List of maps (HotA)]] | ||
[[Category:Single and Multiplayer Scenarios]]</includeonly><noinclude> | [[Category:Single and Multiplayer Scenarios]]</includeonly><noinclude> | ||
==Variables== | |||
NOTE: Defaults are in '''bold'''. No bold means the default is blank. | |||
{| class="wikitable" | |||
|- style="font-weight:bold;" | |||
! scenario | |||
! size | |||
! image_type | |||
! u_image_type | |||
! no_underground | |||
! description | |||
! victory | |||
! loss | |||
! allies | |||
! enemies | |||
! difficulty | |||
|- | |||
| Scenario<br>name | |||
| Size<br>category | |||
| colspan=2 |Image type for overworld/<br>underground pic | |||
| If present,<br>underground disabled | |||
| Scenario<br>description | |||
| Victory conditions | |||
| Loss conditions | |||
| colspan=2 | List of allied (min: 1)/<br>enemy (min: 0) colors | |||
| Default difficulty | |||
|- | |||
| | |||
| {{S map size icon}} '''S'''<br>{{M map size icon}} M<br>{{L map size icon}} L<br>{{XL map size icon}} XL<br>{{H map size icon}} H<br>{{XH map size icon}} XH<br>{{G map size icon}} G | |||
| colspan=2 style="text-align:center;"|'''png'''<br>jpg<br>gif<br>etc. | |||
| {{Underground map icon disabled}} '''(disabled)'''<br>{{Underground map icon enabled}} (enabled) | |||
| | |||
| [[File:Accumulate Creatures.png]] Accumulate Creatures<br>[[File:Accumulate Resources.png]] Accumulate Resources<br>[[File:Acquire Artifact.png]] Acquire Artifact<br>[[File:Build a Grail Structure.png]] Build a Grail Structure<br>[[File:Capture Town.png]] Capture Town<br>[[File:Defeat All Enemies.png]] '''Defeat All Enemies'''<br>[[File:Defeat All Monsters.png]] Defeat All Monsters<br>[[File:Defeat Hero.png]] Defeat Hero<br>[[File:Defeat Monster.png]] Defeat Monster<br>[[File:Flag All Creature Dwellings.png]] Flag All Creature Dwellings<br>[[File:Flag All Mines.png]] Flag All Mines<br>[[File:Survive Until Time Expires.png]] Survive Until Time Expires<br>[[File:Transport Artifact.png]] Transport Artifact<br>[[File:Upgrade Town.png]] Upgrade Town | |||
| [[File:Lose All Your Towns and Heroes.png]] '''Lose All Your Towns and Heroes'''<br>[[File:Lose Hero.png]] Lose Hero<br>[[File:Lose Town.png]] Lose Town<br>[[File:Time Expires.png]] Time Expires | |||
| colspan=2 |{{red}} {{tl|red}}<br>{{blue}} {{tl|blue}}<br>{{tan}} {{tl|tan}}<br>{{green}} {{tl|green}}<br>{{orange}} {{tl|orange}}<br>{{purple}} {{tl|purple}}<br>{{teal}} {{tl|teal}}<br>{{pink}} {{tl|pink}} | |||
| {{Easy difficulty}} Easy<br>{{Normal difficulty}} Normal<br>{{Hard difficulty}} Hard<br>{{Expert difficulty}} Expert<br>{{Impossible difficulty}} Impossible | |||
|} | |||
| | |||
==Example== | ==Example== | ||
{{scenario | {{scenario | ||
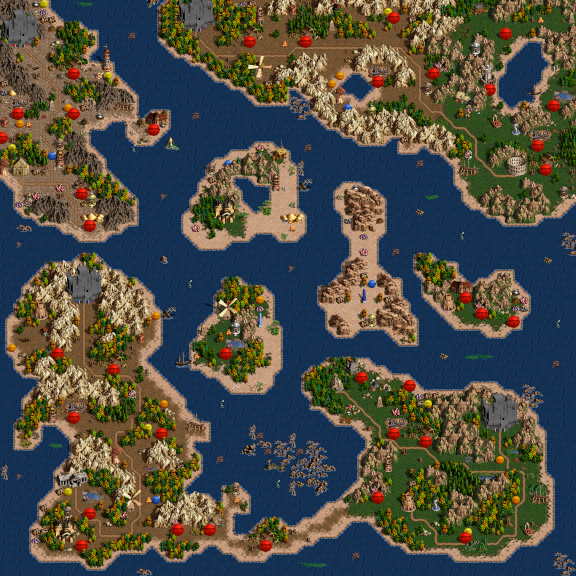
|scenario=Emerald Isles | | scenario = Emerald Isles | ||
|description=The Emerald Isles lie along a major shipping route, which several Barons each seek to control for themselves. You have been chosen to 'persuade' the others to give up their claims. | | description = The Emerald Isles lie along a major shipping route, which several Barons each seek to control for themselves. You have been chosen to 'persuade' the others to give up their claims. | ||
|no_underground= | | no_underground = | ||
}} | }} | ||
Revision as of 19:21, 12 December 2023
Variables
NOTE: Defaults are in bold. No bold means the default is blank.
| scenario | size | image_type | u_image_type | no_underground | description | victory | loss | allies | enemies | difficulty |
|---|---|---|---|---|---|---|---|---|---|---|
| Scenario name |
Size category |
Image type for overworld/ underground pic |
If present, underground disabled |
Scenario description |
Victory conditions | Loss conditions | List of allied (min: 1)/ enemy (min: 0) colors |
Default difficulty | ||
| png jpg gif etc. |
||||||||||
Example
See also
Use TinyPNG.com to compress the map images before uploading (also compresses JPG).

