Fortifications: Difference between revisions
ShushMaster (talk | contribs) No edit summary |
(color fix) |
||
| Line 23: | Line 23: | ||
| | | | ||
| style="padding-bottom:16px; vertical-align:bottom;"| [[File: Adventure Map Castle capitol.gif|link=]] | | style="padding-bottom:16px; vertical-align:bottom;"| [[File: Adventure Map Castle capitol.gif|link=]] | ||
|- style="background-color: | |- style="background-color:aliceblue;" | ||
| style="padding-left:5px; vertical-align:top;"| {{town|Castle|noname=<br>'''Castle'''}}<br>'''[[Horn of the Abyss|HotA]]''' | | style="padding-left:5px; vertical-align:top;"| {{town|Castle|noname=<br>'''Castle'''}}<br>'''[[Horn of the Abyss|HotA]]''' | ||
| style="padding-bottom:16px; vertical-align:bottom;"| [[File: Adventure Map Castle village.gif|link=]] | | style="padding-bottom:16px; vertical-align:bottom;"| [[File: Adventure Map Castle village.gif|link=]] | ||
| Line 37: | Line 37: | ||
| | | | ||
| style="padding-bottom:16px; vertical-align:bottom;"| [[File: Adventure Map Rampart capitol.gif|link=]] | | style="padding-bottom:16px; vertical-align:bottom;"| [[File: Adventure Map Rampart capitol.gif|link=]] | ||
|- style="background-color: | |- style="background-color:aliceblue;" | ||
| style="padding-left:5px; vertical-align:top;"| {{town|Rampart|noname=<br>'''Rampart'''}}<br>'''[[Horn of the Abyss|HotA]]''' | | style="padding-left:5px; vertical-align:top;"| {{town|Rampart|noname=<br>'''Rampart'''}}<br>'''[[Horn of the Abyss|HotA]]''' | ||
| style="padding-bottom:16px; vertical-align:bottom;"| [[File: Adventure Map Rampart village.gif|link=]] | | style="padding-bottom:16px; vertical-align:bottom;"| [[File: Adventure Map Rampart village.gif|link=]] | ||
| Line 51: | Line 51: | ||
| | | | ||
| style="padding-bottom:16px; vertical-align:bottom;"| [[File: Adventure Map Tower capitol.gif|link=]] | | style="padding-bottom:16px; vertical-align:bottom;"| [[File: Adventure Map Tower capitol.gif|link=]] | ||
|- style="background-color: | |- style="background-color:aliceblue;" | ||
| style="padding-left:5px; vertical-align:top;"| {{town|Tower|noname=<br>'''Tower'''}}<br>'''[[Horn of the Abyss|HotA]]''' | | style="padding-left:5px; vertical-align:top;"| {{town|Tower|noname=<br>'''Tower'''}}<br>'''[[Horn of the Abyss|HotA]]''' | ||
| style="padding-bottom:16px; vertical-align:bottom;"| [[File: Adventure Map Tower village.gif|link=]] | | style="padding-bottom:16px; vertical-align:bottom;"| [[File: Adventure Map Tower village.gif|link=]] | ||
| Line 65: | Line 65: | ||
| | | | ||
| style="padding-bottom:16px; vertical-align:bottom;"| [[File: Adventure Map Inferno capitol.gif|link=]] | | style="padding-bottom:16px; vertical-align:bottom;"| [[File: Adventure Map Inferno capitol.gif|link=]] | ||
|- style="background-color: | |- style="background-color:aliceblue;" | ||
| style="padding-left:5px; vertical-align:top;"| {{town|Inferno|noname=<br>'''Inferno'''}}<br>'''[[Horn of the Abyss|HotA]]''' | | style="padding-left:5px; vertical-align:top;"| {{town|Inferno|noname=<br>'''Inferno'''}}<br>'''[[Horn of the Abyss|HotA]]''' | ||
| style="padding-bottom:16px; vertical-align:bottom;"| [[File: Adventure Map Inferno village (HotA).gif|link=]] | | style="padding-bottom:16px; vertical-align:bottom;"| [[File: Adventure Map Inferno village (HotA).gif|link=]] | ||
| Line 79: | Line 79: | ||
| | | | ||
| style="padding-bottom:16px; vertical-align:bottom;"| [[File: Adventure Map Necropolis capitol.gif|link=]] | | style="padding-bottom:16px; vertical-align:bottom;"| [[File: Adventure Map Necropolis capitol.gif|link=]] | ||
|- style="background-color: | |- style="background-color:aliceblue;" | ||
| style="padding-left:5px; vertical-align:top;"| {{town|Necropolis|noname=<br>'''Necropolis'''}}<br>'''[[Horn of the Abyss|HotA]]''' | | style="padding-left:5px; vertical-align:top;"| {{town|Necropolis|noname=<br>'''Necropolis'''}}<br>'''[[Horn of the Abyss|HotA]]''' | ||
| style="padding-bottom:16px; vertical-align:bottom;"| [[File: Adventure Map Necropolis village.gif|link=]] | | style="padding-bottom:16px; vertical-align:bottom;"| [[File: Adventure Map Necropolis village.gif|link=]] | ||
| Line 93: | Line 93: | ||
| | | | ||
| style="padding-bottom:16px; vertical-align:bottom;"| [[File: Adventure Map Dungeon capitol.gif|link=]] | | style="padding-bottom:16px; vertical-align:bottom;"| [[File: Adventure Map Dungeon capitol.gif|link=]] | ||
|- style="background-color: | |- style="background-color:aliceblue;" | ||
| style="padding-left:5px; vertical-align:top;"| {{town|Dungeon|noname=<br>'''Dungeon'''}}<br>'''[[Horn of the Abyss|HotA]]''' | | style="padding-left:5px; vertical-align:top;"| {{town|Dungeon|noname=<br>'''Dungeon'''}}<br>'''[[Horn of the Abyss|HotA]]''' | ||
| style="padding-bottom:16px; vertical-align:bottom;"| [[File: Adventure Map Dungeon village.gif|link=]] | | style="padding-bottom:16px; vertical-align:bottom;"| [[File: Adventure Map Dungeon village.gif|link=]] | ||
| Line 107: | Line 107: | ||
| | | | ||
| style="padding-bottom:16px; vertical-align:bottom;"| [[File: Adventure Map Stronghold capitol.gif|link=]] | | style="padding-bottom:16px; vertical-align:bottom;"| [[File: Adventure Map Stronghold capitol.gif|link=]] | ||
|- style="background-color: | |- style="background-color:aliceblue;" | ||
| style="padding-left:5px; vertical-align:top;"| {{town|Stronghold|noname=<br>'''Stronghold'''}}<br>'''[[Horn of the Abyss|HotA]]''' | | style="padding-left:5px; vertical-align:top;"| {{town|Stronghold|noname=<br>'''Stronghold'''}}<br>'''[[Horn of the Abyss|HotA]]''' | ||
| style="padding-bottom:16px; vertical-align:bottom;"| [[File: Adventure Map Stronghold village.gif|link=]] | | style="padding-bottom:16px; vertical-align:bottom;"| [[File: Adventure Map Stronghold village.gif|link=]] | ||
| Line 121: | Line 121: | ||
| | | | ||
| style="padding-bottom:16px; vertical-align:bottom;"| [[File: Adventure Map Fortress capitol.gif|link=]] | | style="padding-bottom:16px; vertical-align:bottom;"| [[File: Adventure Map Fortress capitol.gif|link=]] | ||
|- style="background-color: | |- style="background-color:aliceblue;" | ||
| style="padding-left:5px; vertical-align:top;"| {{town|Fortress|noname=<br>'''Fortress'''}}<br>'''[[Horn of the Abyss|HotA]]''' | | style="padding-left:5px; vertical-align:top;"| {{town|Fortress|noname=<br>'''Fortress'''}}<br>'''[[Horn of the Abyss|HotA]]''' | ||
| style="padding-bottom:16px; vertical-align:bottom;"| [[File: Adventure Map Fortress village.gif|link=]] | | style="padding-bottom:16px; vertical-align:bottom;"| [[File: Adventure Map Fortress village.gif|link=]] | ||
| Line 135: | Line 135: | ||
| | | | ||
| style="padding-bottom:16px; vertical-align:bottom;"| [[File: Adventure Map Conflux capitol.gif|link=]] | | style="padding-bottom:16px; vertical-align:bottom;"| [[File: Adventure Map Conflux capitol.gif|link=]] | ||
|- style="background-color: | |- style="background-color:aliceblue;" | ||
| style="padding-left:5px; vertical-align:top;"| {{town|Conflux|noname=<br>'''Conflux'''}}<br>'''[[Horn of the Abyss|HotA]]''' | | style="padding-left:5px; vertical-align:top;"| {{town|Conflux|noname=<br>'''Conflux'''}}<br>'''[[Horn of the Abyss|HotA]]''' | ||
| style="padding-bottom:16px; vertical-align:bottom;"| [[File: Adventure Map Conflux village (HotA).gif|link=]] | | style="padding-bottom:16px; vertical-align:bottom;"| [[File: Adventure Map Conflux village (HotA).gif|link=]] | ||
| Line 142: | Line 142: | ||
| style="padding-bottom:16px; vertical-align:bottom;"| [[File: Adventure Map Conflux castle (HotA).gif|link=]] | | style="padding-bottom:16px; vertical-align:bottom;"| [[File: Adventure Map Conflux castle (HotA).gif|link=]] | ||
| style="padding-bottom:16px; vertical-align:bottom;"| [[File: Adventure Map Conflux capitol (HotA).gif|link=]] | | style="padding-bottom:16px; vertical-align:bottom;"| [[File: Adventure Map Conflux capitol (HotA).gif|link=]] | ||
|- style="background-color: | |- style="background-color:aliceblue;" | ||
| style="padding-left:5px; vertical-align:top;"| {{town|Cove|noname=<br>'''Cove'''}}<br>'''[[Horn of the Abyss|HotA]]''' | | style="padding-left:5px; vertical-align:top;"| {{town|Cove|noname=<br>'''Cove'''}}<br>'''[[Horn of the Abyss|HotA]]''' | ||
| style="padding-bottom:16px; vertical-align:bottom;"| [[File: Adventure Map Cove village (HotA).gif|link=]] | | style="padding-bottom:16px; vertical-align:bottom;"| [[File: Adventure Map Cove village (HotA).gif|link=]] | ||
Revision as of 03:51, 4 March 2020
| Buildings | |||||||||||
| Halls | |||||||||||
| Village Hall | |||||||||||
| Town Hall | |||||||||||
| City Hall | |||||||||||
| Capitol | |||||||||||
| Fortifications | |||||||||||
| Fort | |||||||||||
| Citadel | |||||||||||
| Castle | |||||||||||
| Common | |||||||||||
| Blacksmith | |||||||||||
| Mage Guild | |||||||||||
| Marketplace | |||||||||||
| Resource Silo | |||||||||||
| Tavern | |||||||||||
| Specific | |||||||||||
| Artifact Merchants | |||||||||||
| Shipyard | |||||||||||
| Horde buildings | |||||||||||
| Grail buildings | |||||||||||
| Towns | |||||||||||
|---|---|---|---|---|---|---|---|---|---|---|---|
|
|
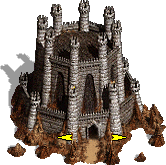
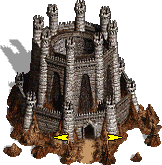
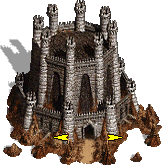
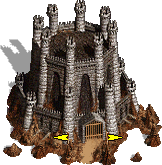
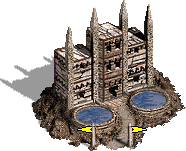
| Fortifications | ||||||||||
|---|---|---|---|---|---|---|---|---|---|---|
| Structure | Cost | Requirements | Benefits | |||||||
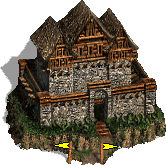
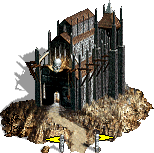
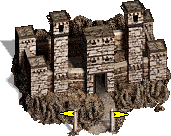
 Fort |
|
• Village Hall | Adds walls to a town | |||||||
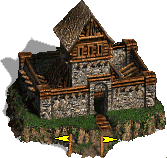
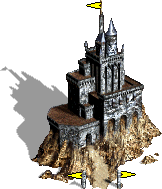
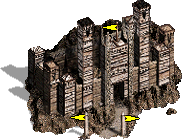
 Citadel |
|
• Fort | Adds moat and primary arrow tower to a town. Increases production of creature dwellings by 50%. | |||||||
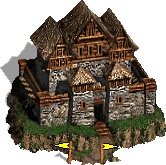
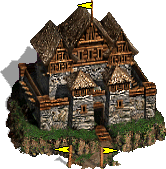
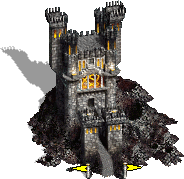
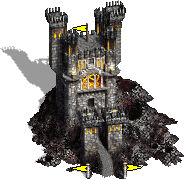
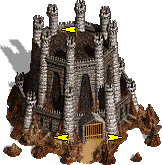
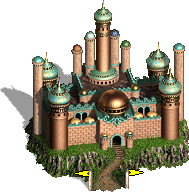
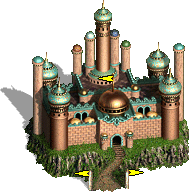
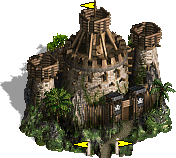
 Castle |
|
• Citadel | Adds two secondary arrow towers, standard walls are strengthened to fortified walls. Increases production of creature dwellings by 100%. | |||||||
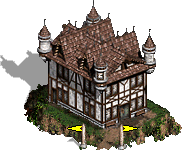
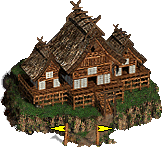
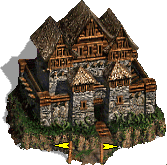
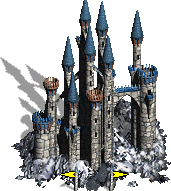
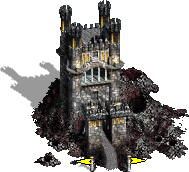
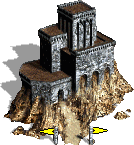
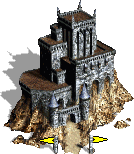
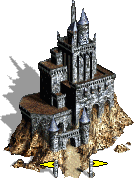
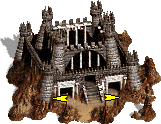
As stated in the manual, castles provide increased security for towns. Fort adds wall to town's defenses. The wall is impassable by non-flying enemy creatures (without advanced Teleport spell), but has a drawbridge for defending creatures to pass through, back and forth if needed. Fort is also prerequisite for all creature dwellings. Additionally, building a Fort to a town changes the town's appearance on the Adventure Map.
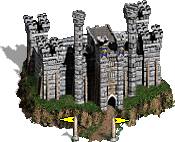
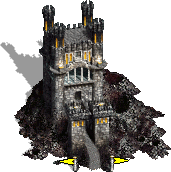
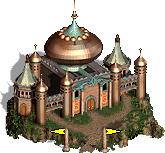
The upgrade to Fort is Citadel, which adds primary arrow tower to town's defenses, and also adds a moat in front of the wall. An exception to this are Tower towns, which do not have a moat but instead building a Citadel adds several Land Mines in front of the wall. One of the greatest advantages of the moat is, that ground units end their movement to it, and cannot move further until their next round (see additional features Moat page). Note that this also works for defending creatures trying to get across the moat. Additionally, Citadel increases the creature dwellings' growth by 50%.
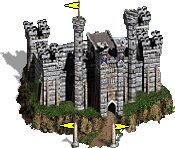
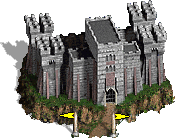
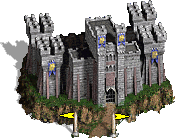
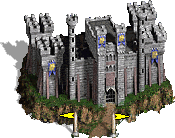
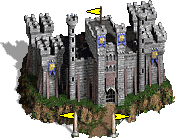
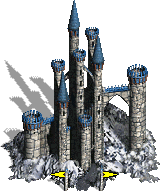
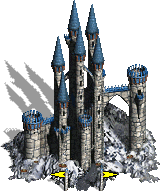
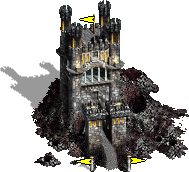
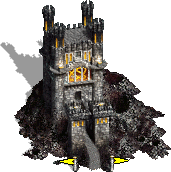
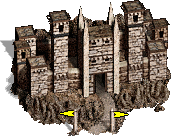
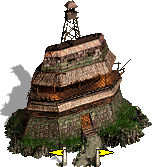
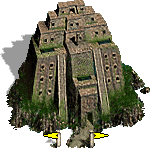
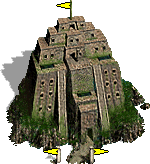
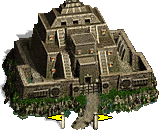
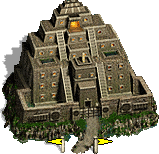
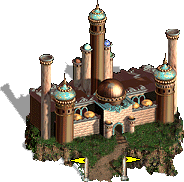
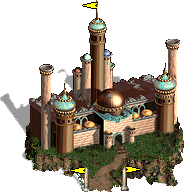
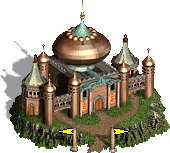
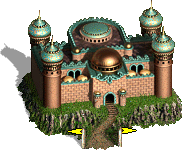
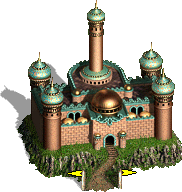
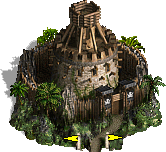
The final defense structure is Castle, which adds two more (secondary) arrow towers and strengthens the wall. The two arrow towers have half the strength of the primary tower added by Citadel. Further, production of creature dwellings is increased by 100%.
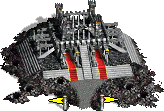
| Towns on adventure map | |||||
|---|---|---|---|---|---|
Village |
Fort |
Citadel |
Castle |
Capitol | |
Castle SoD |
|
|
| ||
Castle HotA |
|
|
|
|
|
Rampart SoD |
|
|
| ||
Rampart HotA |
|
|
|
|

|
Tower SoD |
|
|
| ||
Tower HotA |
|
|
|

|

|
Inferno SoD |
|
|
| ||
Inferno HotA |
|
|
|
|
|
Necropolis SoD |
|

|
| ||
Necropolis HotA |
|
|
|
|

|
Dungeon SoD |
|
|

| ||
Dungeon HotA |
|
|
|
|
|
Stronghold SoD |
|

|
| ||
Stronghold HotA |
|

|
|
|

|
Fortress SoD |
|
|
| ||
Fortress HotA |
|
|

|
|

|
Conflux SoD |
|
|
| ||
Conflux HotA |
|
|
|
|
|
Cove HotA |
|
|
|

|
|