User:ShushMaster/Test1: Difference between revisions
ShushMaster (talk | contribs) No edit summary |
ShushMaster (talk | contribs) No edit summary |
||
| Line 1: | Line 1: | ||
==List of adventure map objects {{hota}}== | ==List of adventure map objects {{hota}}== | ||
{| class="sortable wikitable" cellpadding=5 px | {| class="sortable wikitable" cellpadding=5 px | ||
! Picture | ! class="unsortable" |Picture | ||
! Adventure map object | ! Adventure map object | ||
! data-sort-type="number"|Maximum number in map | ! data-sort-type="number"|Maximum number in map | ||
! data-sort-type="number"|Randomly generated map value | ! data-sort-type="number"|Randomly generated map value | ||
! Visiting Scheme | ! class="unsortable" |Visiting Scheme | ||
|- | |- | ||
| style="text-align:center;"|[[File: Experimental Shop.gif|Experimental Shop|link=Experimental Shop]] | | style="text-align:center;"|[[File: Experimental Shop.gif|Experimental Shop|link=Experimental Shop]] | ||
| Line 11: | Line 11: | ||
| style="text-align:center;"|32 | | style="text-align:center;"|32 | ||
| style="text-align:center;"| 3500 | | style="text-align:center;"| 3500 | ||
| style="text-align:center;"|[[File:Experimental Shop (vs).png|Experimental Shop (vs).png]] | | style="text-align:center;"|[[File:Experimental Shop (vs).png|Experimental Shop (vs).png|link=]] | ||
|- | |- | ||
| style="text-align:center;"|[[File: Wolf Raider Picket.gif|Wolf Raider Picket|link=Wolf Raider Picket]] | | style="text-align:center;"|[[File: Wolf Raider Picket.gif|Wolf Raider Picket|link=Wolf Raider Picket]] | ||
| Line 17: | Line 17: | ||
| style="text-align:center;"| | | style="text-align:center;"| | ||
| style="text-align:center;"| 9500 | | style="text-align:center;"| 9500 | ||
| style="text-align:center;"|[[File:Wolf Raider Picket (vs).png|Wolf Raider Picket (vs).png]] | | style="text-align:center;"|[[File:Wolf Raider Picket (vs).png|Wolf Raider Picket (vs).png|link=]] | ||
|- | |- | ||
| style="text-align:center;"|[[File: Red Tower.gif|Red Tower|link=Red Tower]] | | style="text-align:center;"|[[File: Red Tower.gif|Red Tower|link=Red Tower]] | ||
| Line 23: | Line 23: | ||
| style="text-align:center;"| | | style="text-align:center;"| | ||
| style="text-align:center;"| 4000 | | style="text-align:center;"| 4000 | ||
| style="text-align:center;"|[[File:Red Tower (vs).png|Red Tower (vs).png]] | | style="text-align:center;"|[[File:Red Tower (vs).png|Red Tower (vs).png|link=]] | ||
|- | |- | ||
| style="text-align:center;"|[[File: Black Tower.gif|Black Tower|link=Black Tower]] | | style="text-align:center;"|[[File: Black Tower.gif|Black Tower|link=Black Tower]] | ||
| Line 45: | Line 45: | ||
| style="text-align:center;"| | | style="text-align:center;"| | ||
| style="text-align:center;"| 5000 | | style="text-align:center;"| 5000 | ||
| style="text-align:center;"|[[File:Mansion (vs).png|Mansion (vs).png]] | | style="text-align:center;"|[[File:Mansion (vs).png|Mansion (vs).png|link=]] | ||
|- | |- | ||
| style="text-align:center;"|[[File: Ruins.gif|Ruins|link=Ruins]] | | style="text-align:center;"|[[File: Ruins.gif|Ruins|link=Ruins]] | ||
| Line 64: | Line 64: | ||
| style="text-align:center;"| | | style="text-align:center;"| | ||
| style="text-align:center;"| 2500 | | style="text-align:center;"| 2500 | ||
| style="text-align:center;"|[[File:Beholders' Sanctuary (vs).png|Beholders' Sanctuary (vs).png]] | | style="text-align:center;"|[[File:Beholders' Sanctuary (vs).png|Beholders' Sanctuary (vs).png|link=]] | ||
|- | |- | ||
| style="text-align:center;"|[[File: Temple of the Sea.gif|Temple of the Sea|link=Temple of the Sea]] | | style="text-align:center;"|[[File: Temple of the Sea.gif|Temple of the Sea|link=Temple of the Sea]] | ||
| Line 73: | Line 73: | ||
| style="text-align:center;"| | | style="text-align:center;"| | ||
| style="text-align:center;"| 10000 | | style="text-align:center;"| 10000 | ||
| style="text-align:center;"|[[File:Temple of the Sea (vs).png|Temple of the Sea (vs).png]] | | style="text-align:center;"|[[File:Temple of the Sea (vs).png|Temple of the Sea (vs).png|link=]] | ||
|- | |- | ||
| style="text-align:center;"|[[File: Pirate Cavern.gif|Pirate Cavern|link=Pirate Cavern]] | | style="text-align:center;"|[[File: Pirate Cavern.gif|Pirate Cavern|link=Pirate Cavern]] | ||
| Line 79: | Line 79: | ||
| style="text-align:center;"| | | style="text-align:center;"| | ||
| style="text-align:center;"| | | style="text-align:center;"| | ||
| style="text-align:center;"|[[File:Pirate Cavern (vs).png|Pirate Cavern (vs).png]] | | style="text-align:center;"|[[File:Pirate Cavern (vs).png|Pirate Cavern (vs).png|link=]] | ||
|- | |- | ||
| style="text-align:center;"|[[File: Ivory Tower.gif|Ivory Tower|link=Ivory Tower]] | | style="text-align:center;"|[[File: Ivory Tower.gif|Ivory Tower|link=Ivory Tower]] | ||
| Line 85: | Line 85: | ||
| style="text-align:center;"| | | style="text-align:center;"| | ||
| style="text-align:center;"| | | style="text-align:center;"| | ||
| style="text-align:center;"|[[File:Ivory Tower (sand) (vs).png|Ivory Tower (vs).png]] | | style="text-align:center;"|[[File:Ivory Tower (sand) (vs).png|Ivory Tower (vs).png|link=]] | ||
|- | |- | ||
| style="text-align:center;"|[[File: Spit.gif|Spit|link=Spit]] | | style="text-align:center;"|[[File: Spit.gif|Spit|link=Spit]] | ||
| Line 91: | Line 91: | ||
| style="text-align:center;"| | | style="text-align:center;"| | ||
| style="text-align:center;"| | | style="text-align:center;"| | ||
| style="text-align:center;"|[[File:Spit (vs).png|Spit (vs).png]] | | style="text-align:center;"|[[File:Spit (vs).png|Spit (vs).png|link=]] | ||
|- | |- | ||
| style="text-align:center;"|[[File: Abandoned Mine 4.gif|Abandoned Mine|link=Abandoned Mine]] | | style="text-align:center;"|[[File: Abandoned Mine 4.gif|Abandoned Mine|link=Abandoned Mine]] | ||
| Line 97: | Line 97: | ||
| style="text-align:center;"| 144 <span style="font-size: 90%;">(all [[mines]] and [[lighthouse]]s)</span> | | style="text-align:center;"| 144 <span style="font-size: 90%;">(all [[mines]] and [[lighthouse]]s)</span> | ||
| style="text-align:center;"| | | style="text-align:center;"| | ||
| style="text-align:center;"|[[File:Abandoned Mine (vs).png|Abandoned Mine (vs).png]] | | style="text-align:center;"|[[File:Abandoned Mine (vs).png|Abandoned Mine (vs).png|link=]] | ||
|- | |- | ||
| style="text-align:center;"|[[File: Alchemist's Lab.gif|Alchemist's Lab|link=Alchemist's Lab]] | | style="text-align:center;"|[[File: Alchemist's Lab.gif|Alchemist's Lab|link=Alchemist's Lab]] | ||
| Line 103: | Line 103: | ||
| style="text-align:center;"| 144 <span style="font-size: 90%;">(all [[mines]] and [[lighthouse]]s)</span> | | style="text-align:center;"| 144 <span style="font-size: 90%;">(all [[mines]] and [[lighthouse]]s)</span> | ||
| style="text-align:center;"| 3500 | | style="text-align:center;"| 3500 | ||
| style="text-align:center;"|[[File:Alchemist's Lab (vs).png|Alchemist's Lab (vs).png]] | | style="text-align:center;"|[[File:Alchemist's Lab (vs).png|Alchemist's Lab (vs).png|link=]] | ||
|- | |- | ||
| style="text-align:center;"|[[File: Altar of Sacrifice.gif|link=Altar of Sacrifice]] | | style="text-align:center;"|[[File: Altar of Sacrifice.gif|link=Altar of Sacrifice]] | ||
| Line 109: | Line 109: | ||
| style="text-align:center;"|Unlimited | | style="text-align:center;"|Unlimited | ||
| style="text-align:center;"| 100 | | style="text-align:center;"| 100 | ||
| style="text-align:center;"|[[File:Altar of Sacrifice (vs).png|Altar of Sacrifice (vs).png]] | | style="text-align:center;"|[[File:Altar of Sacrifice (vs).png|Altar of Sacrifice (vs).png|link=]] | ||
|- | |- | ||
| style="text-align:center;"|[[File: Anti-Magic Garrison (horizontal).gif|Anti-magic Garrison|link=Anti-Magic Garrison]] | | style="text-align:center;"|[[File: Anti-Magic Garrison (horizontal).gif|Anti-magic Garrison|link=Anti-Magic Garrison]] | ||
| Line 115: | Line 115: | ||
| style="text-align:center;"|48 | | style="text-align:center;"|48 | ||
| style="text-align:center;"| - | | style="text-align:center;"| - | ||
| style="text-align:center;"|[[File:Garrison (horizontal) (vs).png|Garrison (horizontal) (vs).png]] | | style="text-align:center;"|[[File:Garrison (horizontal) (vs).png|Garrison (horizontal) (vs).png|link=]] | ||
|- | |- | ||
| style="text-align:center;"|[[File: Arena.gif|Arena|link=Arena]] | | style="text-align:center;"|[[File: Arena.gif|Arena|link=Arena]] | ||
| Line 121: | Line 121: | ||
| style="text-align:center;"|32 | | style="text-align:center;"|32 | ||
| style="text-align:center;"| 3000 | | style="text-align:center;"| 3000 | ||
| style="text-align:center;"|[[File:Arena (vs).png|Arena (vs).png]] | | style="text-align:center;"|[[File:Arena (vs).png|Arena (vs).png|link=]] | ||
|- | |- | ||
| style="text-align:center;"|[[File: Armor of Wonder artifact.gif|Artifact|link=Artifact]] | | style="text-align:center;"|[[File: Armor of Wonder artifact.gif|Artifact|link=Artifact]] | ||
| Line 127: | Line 127: | ||
| style="text-align:center;"|Unlimited | | style="text-align:center;"|Unlimited | ||
| style="text-align:center;"| 2000 - Treasure<br>5000 - Minor<br>10000 - Major<br>20000 - Relic | | style="text-align:center;"| 2000 - Treasure<br>5000 - Minor<br>10000 - Major<br>20000 - Relic | ||
| style="text-align:center;"|[[File:Artifact (vs).png| (vs).png]] | | style="text-align:center;"|[[File:Artifact (vs).png| (vs).png|link=]] | ||
|- | |- | ||
| style="text-align:center;"|[[File: Black Market.gif|Black Market|link=Black Market]] | | style="text-align:center;"|[[File: Black Market.gif|Black Market|link=Black Market]] | ||
| Line 133: | Line 133: | ||
| style="text-align:center;"|32 | | style="text-align:center;"|32 | ||
| style="text-align:center;"| 8000 | | style="text-align:center;"| 8000 | ||
| style="text-align:center;"|[[File:Black Market (vs).png|Black Market (vs).png]] | | style="text-align:center;"|[[File:Black Market (vs).png|Black Market (vs).png|link=]] | ||
|- | |- | ||
| style="text-align:center;"|[[File:Boat spell-necro-flux.gif]][[File:Boat spell-necro-flux(d).gif]] | | style="text-align:center;"|[[File:Boat spell-necro-flux.gif]][[File:Boat spell-necro-flux(d).gif]] | ||
| Line 147: | Line 147: | ||
| style="text-align:center;"|Unlimited | | style="text-align:center;"|Unlimited | ||
| style="text-align:center;"| - | | style="text-align:center;"| - | ||
| style="text-align:center;"|[[File:Border Gate (vs).png|Border Gate (vs).png]] | | style="text-align:center;"|[[File:Border Gate (vs).png|Border Gate (vs).png|link=]] | ||
|- | |- | ||
| style="text-align:center;"|[[File: Border Guard (8in1).gif|Border Guard|link=Border Guard]] | | style="text-align:center;"|[[File: Border Guard (8in1).gif|Border Guard|link=Border Guard]] | ||
| Line 153: | Line 153: | ||
| style="text-align:center;"|Unlimited | | style="text-align:center;"|Unlimited | ||
| style="text-align:center;"| - | | style="text-align:center;"| - | ||
| style="text-align:center;"|[[File:Border Guard (vs).png|Border Guard (vs).png]] | | style="text-align:center;"|[[File:Border Guard (vs).png|Border Guard (vs).png|link=]] | ||
|- | |- | ||
| style="text-align:center;"|[[File: Buoy.gif|Buoy|link=Buoy]] | | style="text-align:center;"|[[File: Buoy.gif|Buoy|link=Buoy]] | ||
| Line 159: | Line 159: | ||
| style="text-align:center;"|Unlimited | | style="text-align:center;"|Unlimited | ||
| style="text-align:center;"| 100 | | style="text-align:center;"| 100 | ||
| style="text-align:center;"|[[File:Buoy (vs).png|Buoy (vs).png]] | | style="text-align:center;"|[[File:Buoy (vs).png|Buoy (vs).png|link=]] | ||
|- | |- | ||
| style="text-align:center;"|[[File: Campfire.gif|Campfire|link=Campfire]] | | style="text-align:center;"|[[File: Campfire.gif|Campfire|link=Campfire]] | ||
| Line 165: | Line 165: | ||
| style="text-align:center;"|Unlimited | | style="text-align:center;"|Unlimited | ||
| style="text-align:center;"| 2000 | | style="text-align:center;"| 2000 | ||
| style="text-align:center;"|[[File:Campfire (vs).png|Campfire (vs).png]] | | style="text-align:center;"|[[File:Campfire (vs).png|Campfire (vs).png|link=]] | ||
|- | |- | ||
| style="text-align:center;"|[[File: Cartographer.gif|Cartographer|link=Cartographer]][[File: Cartographer (water).gif|bottom|Cartographer|link=Cartographer]][[File: Cartographer (subterranean).gif|Cartographer|link=Cartographer]] | | style="text-align:center;"|[[File: Cartographer.gif|Cartographer|link=Cartographer]][[File: Cartographer (water).gif|bottom|Cartographer|link=Cartographer]][[File: Cartographer (subterranean).gif|Cartographer|link=Cartographer]] | ||
| Line 171: | Line 171: | ||
| style="text-align:center;"|Unlimited | | style="text-align:center;"|Unlimited | ||
| style="text-align:center;"| 10000 - Surface<br>7500 - Subterranean<br>5000 - Water | | style="text-align:center;"| 10000 - Surface<br>7500 - Subterranean<br>5000 - Water | ||
| style="text-align:center;"|[[File:Cartographer (vs).png|Cartographer (vs).png]] | | style="text-align:center;"|[[File:Cartographer (vs).png|Cartographer (vs).png|link=]] | ||
|- | |- | ||
| style="text-align:center;"|[[File: Corpse.gif|Corpse|link=Corpse]] | | style="text-align:center;"|[[File: Corpse.gif|Corpse|link=Corpse]] | ||
| Line 177: | Line 177: | ||
| style="text-align:center;"|32 | | style="text-align:center;"|32 | ||
| style="text-align:center;"| 500 | | style="text-align:center;"| 500 | ||
| style="text-align:center;"|[[File:Corpse (vs).png|Corpse (vs).png]] | | style="text-align:center;"|[[File:Corpse (vs).png|Corpse (vs).png|link=]] | ||
|- | |- | ||
| style="text-align:center;"|[[File: Cover of Darkness.gif|Cover of Darkness (Adventure Map)|link=Cover of Darkness (Adventure Map)]] | | style="text-align:center;"|[[File: Cover of Darkness.gif|Cover of Darkness (Adventure Map)|link=Cover of Darkness (Adventure Map)]] | ||
| Line 183: | Line 183: | ||
| style="text-align:center;"|Unlimited | | style="text-align:center;"|Unlimited | ||
| style="text-align:center;"| - | | style="text-align:center;"| - | ||
| style="text-align:center;"|[[File:Cover of Darkness (vs).png|x96px]] | | style="text-align:center;"|[[File:Cover of Darkness (vs).png|link=|x96px]] | ||
|- | |- | ||
| style="text-align:center;"|[[File:Dwelling.gif|Creature dwelling|link=Creature dwelling]] | | style="text-align:center;"|[[File:Dwelling.gif|Creature dwelling|link=Creature dwelling]] | ||
| Line 195: | Line 195: | ||
| style="text-align:center;"|Unlimited | | style="text-align:center;"|Unlimited | ||
| style="text-align:center;"| 1000 | | style="text-align:center;"| 1000 | ||
| style="text-align:center;"|[[File:Crypt (vs).png|Crypt (vs).png]] | | style="text-align:center;"|[[File:Crypt (vs).png|Crypt (vs).png|link=]] | ||
|- | |- | ||
| style="text-align:center;"|[[File: Crystal Cavern.gif|Crystal Cavern|link=Crystal Cavern]] | | style="text-align:center;"|[[File: Crystal Cavern.gif|Crystal Cavern|link=Crystal Cavern]] | ||
| Line 201: | Line 201: | ||
| style="text-align:center;"| 144 <span style="font-size: 90%;">(all [[mines]] and [[lighthouse]]s)</span> | | style="text-align:center;"| 144 <span style="font-size: 90%;">(all [[mines]] and [[lighthouse]]s)</span> | ||
| style="text-align:center;"| 3500 | | style="text-align:center;"| 3500 | ||
| style="text-align:center;"|[[File:Crystal Cavern (vs).png|Crystal Cavern (vs).png]] | | style="text-align:center;"|[[File:Crystal Cavern (vs).png|Crystal Cavern (vs).png|link=]] | ||
|- | |- | ||
| style="text-align:center;"|[[File: Cyclops Stockpile.gif|Cyclops Stockpile|link=Cyclops Stockpile]] | | style="text-align:center;"|[[File: Cyclops Stockpile.gif|Cyclops Stockpile|link=Cyclops Stockpile]] | ||
| Line 207: | Line 207: | ||
| style="text-align:center;"|Unlimited | | style="text-align:center;"|Unlimited | ||
| style="text-align:center;"| 3000 | | style="text-align:center;"| 3000 | ||
| style="text-align:center;"|[[File:Cyclops Stockpile (vs).png|Cyclops Stockpile (vs).png]] | | style="text-align:center;"|[[File:Cyclops Stockpile (vs).png|Cyclops Stockpile (vs).png|link=]] | ||
|- | |- | ||
| style="text-align:center;"|[[File: Den of Thieves.gif|Den of Thieves|link=Den of Thieves]] | | style="text-align:center;"|[[File: Den of Thieves.gif|Den of Thieves|link=Den of Thieves]] | ||
| Line 213: | Line 213: | ||
| style="text-align:center;"|Unlimited | | style="text-align:center;"|Unlimited | ||
| style="text-align:center;"| 100 | | style="text-align:center;"| 100 | ||
| style="text-align:center;"|[[File:Den of Thieves (vs).png|Den of Thieves (vs).png]] | | style="text-align:center;"|[[File:Den of Thieves (vs).png|Den of Thieves (vs).png|link=]] | ||
|- | |- | ||
| style="text-align:center;"|[[File: Derelict Ship.gif|Derelict Ship|link=Derelict Ship]] | | style="text-align:center;"|[[File: Derelict Ship.gif|Derelict Ship|link=Derelict Ship]] | ||
| Line 219: | Line 219: | ||
| style="text-align:center;"|Unlimited | | style="text-align:center;"|Unlimited | ||
| style="text-align:center;"| 4000 | | style="text-align:center;"| 4000 | ||
| style="text-align:center;"|[[File:Derelict Ship (vs).png|Derelict Ship (vs).png]] | | style="text-align:center;"|[[File:Derelict Ship (vs).png|Derelict Ship (vs).png|link=]] | ||
|- | |- | ||
| style="text-align:center;"|[[File: Dragon Fly Hive.gif|Dragon Fly Hive|link=Dragon Fly Hive]] | | style="text-align:center;"|[[File: Dragon Fly Hive.gif|Dragon Fly Hive|link=Dragon Fly Hive]] | ||
| Line 225: | Line 225: | ||
| style="text-align:center;"|Unlimited | | style="text-align:center;"|Unlimited | ||
| style="text-align:center;"| 9000 | | style="text-align:center;"| 9000 | ||
| style="text-align:center;"|[[File:Dragon Fly Hive (vs).png|Dragon Fly Hive (vs).png]] | | style="text-align:center;"|[[File:Dragon Fly Hive (vs).png|Dragon Fly Hive (vs).png|link=]] | ||
|- | |- | ||
| style="text-align:center;"|[[File: Dragon Utopia.gif|Dragon Utopia|link=Dragon Utopia]] | | style="text-align:center;"|[[File: Dragon Utopia.gif|Dragon Utopia|link=Dragon Utopia]] | ||
| Line 231: | Line 231: | ||
| style="text-align:center;"|Unlimited | | style="text-align:center;"|Unlimited | ||
| style="text-align:center;"|10000 | | style="text-align:center;"|10000 | ||
| style="text-align:center;"|[[File:Dragon Utopia (vs).png|x137px]] | | style="text-align:center;"|[[File:Dragon Utopia (vs).png|link=|x137px]] | ||
|- | |- | ||
| style="text-align:center;"|[[File: Dwarven Treasury.gif|Dwarven Treasury|link=Dwarven Treasury]] | | style="text-align:center;"|[[File: Dwarven Treasury.gif|Dwarven Treasury|link=Dwarven Treasury]] | ||
| Line 237: | Line 237: | ||
| style="text-align:center;"|Unlimited | | style="text-align:center;"|Unlimited | ||
| style="text-align:center;"| 2000 | | style="text-align:center;"| 2000 | ||
| style="text-align:center;"|[[File:Dwarven Treasury (vs).png|Dwarven Treasury (vs).png]] | | style="text-align:center;"|[[File:Dwarven Treasury (vs).png|Dwarven Treasury (vs).png|link=]] | ||
|- | |- | ||
| style="text-align:center;"|[[File:Event.gif|Event|link=Event]] | | style="text-align:center;"|[[File:Event.gif|Event|link=Event]] | ||
| Line 249: | Line 249: | ||
| style="text-align:center;"|Unlimited | | style="text-align:center;"|Unlimited | ||
| style="text-align:center;"| - | | style="text-align:center;"| - | ||
| style="text-align:center;"|[[File:Eye of the Magi (vs).png|Eye of the Magi (vs).png]] | | style="text-align:center;"|[[File:Eye of the Magi (vs).png|Eye of the Magi (vs).png|link=]] | ||
|- | |- | ||
| style="text-align:center;"|[[File: Faerie Ring.gif|Faerie Ring|link=Faerie Ring]] | | style="text-align:center;"|[[File: Faerie Ring.gif|Faerie Ring|link=Faerie Ring]] | ||
| Line 255: | Line 255: | ||
| style="text-align:center;"|Unlimited | | style="text-align:center;"|Unlimited | ||
| style="text-align:center;"| 100 | | style="text-align:center;"| 100 | ||
| style="text-align:center;"|[[File:Faerie Ring (vs).png|Faerie Ring (vs).png]] | | style="text-align:center;"|[[File:Faerie Ring (vs).png|Faerie Ring (vs).png|link=]] | ||
|- | |- | ||
| style="text-align:center;"|[[File: Flotsam.gif|Flotsam|link=Flotsam]] | | style="text-align:center;"|[[File: Flotsam.gif|Flotsam|link=Flotsam]] | ||
| Line 261: | Line 261: | ||
| style="text-align:center;"|Unlimited | | style="text-align:center;"|Unlimited | ||
| style="text-align:center;"| 500 | | style="text-align:center;"| 500 | ||
| style="text-align:center;"|[[File:Flotsam (vs).png|Flotsam (vs).png]] | | style="text-align:center;"|[[File:Flotsam (vs).png|Flotsam (vs).png|link=]] | ||
|- | |- | ||
| style="text-align:center;"|[[File: Fountain of Fortune.gif|Fountain of Fortune|link=Fountain of Fortune (adventure map)]] | | style="text-align:center;"|[[File: Fountain of Fortune.gif|Fountain of Fortune|link=Fountain of Fortune (adventure map)]] | ||
| Line 267: | Line 267: | ||
| style="text-align:center;"|Unlimited | | style="text-align:center;"|Unlimited | ||
| style="text-align:center;"| 100 | | style="text-align:center;"| 100 | ||
| style="text-align:center;"|[[File:Fountain of Fortune (vs).png|Fountain of Fortune (vs).png]] | | style="text-align:center;"|[[File:Fountain of Fortune (vs).png|Fountain of Fortune (vs).png|link=]] | ||
|- | |- | ||
| style="text-align:center;"|[[File: Fountain of Youth.gif|Fountain of Youth|link=Fountain of Youth]] | | style="text-align:center;"|[[File: Fountain of Youth.gif|Fountain of Youth|link=Fountain of Youth]] | ||
| Line 273: | Line 273: | ||
| style="text-align:center;"|Unlimited | | style="text-align:center;"|Unlimited | ||
| style="text-align:center;"| 100 | | style="text-align:center;"| 100 | ||
| style="text-align:center;"|[[File:Fountain of Youth (vs).png|Fountain of Youth (vs).png]] | | style="text-align:center;"|[[File:Fountain of Youth (vs).png|Fountain of Youth (vs).png|link=]] | ||
|- | |- | ||
| style="text-align:center;"|[[File: Freelancer's Guild.gif|Freelancer's Guild|link=Freelancer's Guild]] | | style="text-align:center;"|[[File: Freelancer's Guild.gif|Freelancer's Guild|link=Freelancer's Guild]] | ||
| Line 279: | Line 279: | ||
| style="text-align:center;"|Unlimited | | style="text-align:center;"|Unlimited | ||
| style="text-align:center;"| - | | style="text-align:center;"| - | ||
| style="text-align:center;"|[[File:Freelancer's Guild (vs).png|Freelancer's Guild (vs).png]] | | style="text-align:center;"|[[File:Freelancer's Guild (vs).png|Freelancer's Guild (vs).png|link=]] | ||
|- | |- | ||
| style="text-align:center;"|[[File: Garden of Revelation.gif|Garden of Revelation|link=Garden of Revelation]] | | style="text-align:center;"|[[File: Garden of Revelation.gif|Garden of Revelation|link=Garden of Revelation]] | ||
| Line 285: | Line 285: | ||
| style="text-align:center;"|32 | | style="text-align:center;"|32 | ||
| style="text-align:center;"| 1500 | | style="text-align:center;"| 1500 | ||
| style="text-align:center;"|[[File:Garden of Revelation (vs).png|Garden of Revelation (vs).png]] | | style="text-align:center;"|[[File:Garden of Revelation (vs).png|Garden of Revelation (vs).png|link=]] | ||
|- | |- | ||
| style="text-align:center;"|[[File: Garrison (horizontal).gif|Garrison|link=Garrison]] | | style="text-align:center;"|[[File: Garrison (horizontal).gif|Garrison|link=Garrison]] | ||
| Line 291: | Line 291: | ||
| style="text-align:center;"|48 | | style="text-align:center;"|48 | ||
| style="text-align:center;"| - | | style="text-align:center;"| - | ||
| style="text-align:center;"|[[File:Garrison (horizontal) (vs).png|Garrison (horizontal) (vs).png]] | | style="text-align:center;"|[[File:Garrison (horizontal) (vs).png|Garrison (horizontal) (vs).png|link=]] | ||
|- | |- | ||
| style="text-align:center;"|[[File: Gem Pond.gif|Gem Pond|link=Gem Pond]] | | style="text-align:center;"|[[File: Gem Pond.gif|Gem Pond|link=Gem Pond]] | ||
| Line 297: | Line 297: | ||
| style="text-align:center;"| 144 <span style="font-size: 90%;">(all [[mines]] and [[lighthouse]]s)</span> | | style="text-align:center;"| 144 <span style="font-size: 90%;">(all [[mines]] and [[lighthouse]]s)</span> | ||
| style="text-align:center;"| 3500 | | style="text-align:center;"| 3500 | ||
| style="text-align:center;"|[[File:Gem Pond (vs).png|Gem Pond (vs).png]] | | style="text-align:center;"|[[File:Gem Pond (vs).png|Gem Pond (vs).png|link=]] | ||
|- | |- | ||
| style="text-align:center;"|[[File: Gold Mine.gif|Gold Mine|link=Gold Mine]] | | style="text-align:center;"|[[File: Gold Mine.gif|Gold Mine|link=Gold Mine]] | ||
| Line 303: | Line 303: | ||
| style="text-align:center;"| 144 <span style="font-size: 90%;">(all [[mines]] and [[lighthouse]]s)</span> | | style="text-align:center;"| 144 <span style="font-size: 90%;">(all [[mines]] and [[lighthouse]]s)</span> | ||
| style="text-align:center;"| 7000 | | style="text-align:center;"| 7000 | ||
| style="text-align:center;"|[[File:Gold Mine (vs).png|Gold Mine (vs).png]] | | style="text-align:center;"|[[File:Gold Mine (vs).png|Gold Mine (vs).png|link=]] | ||
|- | |- | ||
| style="text-align:center;"|[[File: Griffin Conservatory.gif|Griffin Conservatory|link=Griffin Conservatory]] | | style="text-align:center;"|[[File: Griffin Conservatory.gif|Griffin Conservatory|link=Griffin Conservatory]] | ||
| Line 309: | Line 309: | ||
| style="text-align:center;"|Unlimited | | style="text-align:center;"|Unlimited | ||
| style="text-align:center;"| 2000 | | style="text-align:center;"| 2000 | ||
| style="text-align:center;"|[[File:Griffin Conservatory (vs).png|Griffin Conservatory (vs).png]] | | style="text-align:center;"|[[File:Griffin Conservatory (vs).png|Griffin Conservatory (vs).png|link=]] | ||
|- | |- | ||
| style="text-align:center;"|[[File: Hill Fort.gif|Hill Fort|link=Hill Fort]] | | style="text-align:center;"|[[File: Hill Fort.gif|Hill Fort|link=Hill Fort]] | ||
| Line 315: | Line 315: | ||
| style="text-align:center;"|Unlimited | | style="text-align:center;"|Unlimited | ||
| style="text-align:center;"| 7000 | | style="text-align:center;"| 7000 | ||
| style="text-align:center;"|[[File:Hill Fort (vs).png|Hill Fort (vs).png]] | | style="text-align:center;"|[[File:Hill Fort (vs).png|Hill Fort (vs).png|link=]] | ||
|- | |- | ||
| style="text-align:center;"|[[File: Hut of the Magi.gif|Hut of the Magi|link=Hut of the Magi]] | | style="text-align:center;"|[[File: Hut of the Magi.gif|Hut of the Magi|link=Hut of the Magi]] | ||
| Line 321: | Line 321: | ||
| style="text-align:center;"|Unlimited | | style="text-align:center;"|Unlimited | ||
| style="text-align:center;"| - | | style="text-align:center;"| - | ||
| style="text-align:center;"|[[File:Hut of the Magi (vs).png|Hut of the Magi (vs).png]] | | style="text-align:center;"|[[File:Hut of the Magi (vs).png|Hut of the Magi (vs).png|link=]] | ||
|- | |- | ||
| style="text-align:center;"|[[File: Idol of Fortune.gif|Idol of Fortune|link=Idol of Fortune]] | | style="text-align:center;"|[[File: Idol of Fortune.gif|Idol of Fortune|link=Idol of Fortune]] | ||
| Line 327: | Line 327: | ||
| style="text-align:center;"|Unlimited | | style="text-align:center;"|Unlimited | ||
| style="text-align:center;"| 100 | | style="text-align:center;"| 100 | ||
| style="text-align:center;"|[[File:Idol of Fortune (vs).png|Idol of Fortune (vs).png]] | | style="text-align:center;"|[[File:Idol of Fortune (vs).png|Idol of Fortune (vs).png|link=]] | ||
|- | |- | ||
| style="text-align:center;"|[[File: Imp Cache.gif|Imp Cache|link=Imp Cache]] | | style="text-align:center;"|[[File: Imp Cache.gif|Imp Cache|link=Imp Cache]] | ||
| Line 333: | Line 333: | ||
| style="text-align:center;"|Unlimited | | style="text-align:center;"|Unlimited | ||
| style="text-align:center;"| 5000 | | style="text-align:center;"| 5000 | ||
| style="text-align:center;"|[[File:Imp Cache (vs).png|Imp Cache (vs).png]] | | style="text-align:center;"|[[File:Imp Cache (vs).png|Imp Cache (vs).png|link=]] | ||
|- | |- | ||
| style="text-align:center;"|[[File: Keymaster's Tent (8in1).gif|Keymaster's Tent|link=Keymaster's Tent]] | | style="text-align:center;"|[[File: Keymaster's Tent (8in1).gif|Keymaster's Tent|link=Keymaster's Tent]] | ||
| Line 339: | Line 339: | ||
| style="text-align:center;"|Unlimited | | style="text-align:center;"|Unlimited | ||
| style="text-align:center;"| - | | style="text-align:center;"| - | ||
| style="text-align:center;"|[[File:Keymaster's Tent (vs).png|Keymaster's Tent (vs).png]] | | style="text-align:center;"|[[File:Keymaster's Tent (vs).png|Keymaster's Tent (vs).png|link=]] | ||
|- | |- | ||
| style="text-align:center;"|[[File: Lean To.gif|Lean To|link=Lean To]] | | style="text-align:center;"|[[File: Lean To.gif|Lean To|link=Lean To]] | ||
| Line 345: | Line 345: | ||
| style="text-align:center;"|32 | | style="text-align:center;"|32 | ||
| style="text-align:center;"| 500 | | style="text-align:center;"| 500 | ||
| style="text-align:center;"|[[File:Lean To (vs).png|Lean To (vs).png]] | | style="text-align:center;"|[[File:Lean To (vs).png|Lean To (vs).png|link=]] | ||
|- | |- | ||
| style="text-align:center;"|[[File: Learning Stone.gif|Learning Stone|link=Learning Stone]] | | style="text-align:center;"|[[File: Learning Stone.gif|Learning Stone|link=Learning Stone]] | ||
| Line 351: | Line 351: | ||
| style="text-align:center;"|32 | | style="text-align:center;"|32 | ||
| style="text-align:center;"| 1500 | | style="text-align:center;"| 1500 | ||
| style="text-align:center;"|[[File:Learning Stone (vs).png|Learning Stone (vs).png]] | | style="text-align:center;"|[[File:Learning Stone (vs).png|Learning Stone (vs).png|link=]] | ||
|- | |- | ||
| style="text-align:center;"|[[File: Library of Enlightenment.gif|Library of Enlightenment|link=Library of Enlightenment]] | | style="text-align:center;"|[[File: Library of Enlightenment.gif|Library of Enlightenment|link=Library of Enlightenment]] | ||
| Line 357: | Line 357: | ||
| style="text-align:center;"|32 | | style="text-align:center;"|32 | ||
| style="text-align:center;"|12000 | | style="text-align:center;"|12000 | ||
| style="text-align:center;"|[[File:Library of Enlightenment (vs).png|Library of Enlightenment (vs).png]] | | style="text-align:center;"|[[File:Library of Enlightenment (vs).png|Library of Enlightenment (vs).png|link=]] | ||
|- | |- | ||
| style="text-align:center;"|[[File: Lighthouse.gif|Lighthouse|link=Lighthouse]] | | style="text-align:center;"|[[File: Lighthouse.gif|Lighthouse|link=Lighthouse]] | ||
| Line 363: | Line 363: | ||
| style="text-align:center;"|144 <span style="font-size: 90%;">(all [[mines]] and [[lighthouse]]s)</span>. | | style="text-align:center;"|144 <span style="font-size: 90%;">(all [[mines]] and [[lighthouse]]s)</span>. | ||
| style="text-align:center;"| - | | style="text-align:center;"| - | ||
| style="text-align:center;"|[[File:Lighthouse (vs).png|x110px]] | | style="text-align:center;"|[[File:Lighthouse (vs).png|link=|x110px]] | ||
|- | |- | ||
| style="text-align:center;"|[[File: Magic Spring.gif|Magic Spring|link=Magic Spring]] | | style="text-align:center;"|[[File: Magic Spring.gif|Magic Spring|link=Magic Spring]] | ||
| Line 369: | Line 369: | ||
| style="text-align:center;"|32 | | style="text-align:center;"|32 | ||
| style="text-align:center;"| 500 | | style="text-align:center;"| 500 | ||
| style="text-align:center;"|[[File:Magic Spring (vs).png|Magic Spring (vs).png]] | | style="text-align:center;"|[[File:Magic Spring (vs).png|Magic Spring (vs).png|link=]] | ||
|- | |- | ||
| style="text-align:center;"|[[File: Magic Well.gif|Magic Well|link=Magic Well]] | | style="text-align:center;"|[[File: Magic Well.gif|Magic Well|link=Magic Well]] | ||
| Line 375: | Line 375: | ||
| style="text-align:center;"|Unlimited | | style="text-align:center;"|Unlimited | ||
| style="text-align:center;"| 250 | | style="text-align:center;"| 250 | ||
| style="text-align:center;"|[[File:Magic Well (vs).png|Magic Well (vs).png]] | | style="text-align:center;"|[[File:Magic Well (vs).png|Magic Well (vs).png|link=]] | ||
|- | |- | ||
| style="text-align:center;"|[[File: Market of Time.gif|Market of Time|link=Market of Time]] | | style="text-align:center;"|[[File: Market of Time.gif|Market of Time|link=Market of Time]] | ||
| Line 387: | Line 387: | ||
| style="text-align:center;"|32 | | style="text-align:center;"|32 | ||
| style="text-align:center;"| 1500 | | style="text-align:center;"| 1500 | ||
| style="text-align:center;"|[[File:Marletto Tower (vs).png|Marletto Tower (vs).png]] | | style="text-align:center;"|[[File:Marletto Tower (vs).png|Marletto Tower (vs).png|link=]] | ||
|- | |- | ||
| style="text-align:center;"|[[File: Medusa Stores.gif|Medusa Stores|link=Medusa Stores]] | | style="text-align:center;"|[[File: Medusa Stores.gif|Medusa Stores|link=Medusa Stores]] | ||
| Line 393: | Line 393: | ||
| style="text-align:center;"|Unlimited | | style="text-align:center;"|Unlimited | ||
| style="text-align:center;"| 1500 | | style="text-align:center;"| 1500 | ||
| style="text-align:center;"|[[File:Medusa Stores (vs).png|Medusa Stores (vs).png]] | | style="text-align:center;"|[[File:Medusa Stores (vs).png|Medusa Stores (vs).png|link=]] | ||
|- | |- | ||
| style="text-align:center;"|[[File: Mercenary Camp.gif|Mercenary Camp|link=Mercenary Camp]] | | style="text-align:center;"|[[File: Mercenary Camp.gif|Mercenary Camp|link=Mercenary Camp]] | ||
| Line 399: | Line 399: | ||
| style="text-align:center;"|32 | | style="text-align:center;"|32 | ||
| style="text-align:center;"| 1500 | | style="text-align:center;"| 1500 | ||
| style="text-align:center;"|[[File:Mercenary Camp (vs).png|Mercenary Camp (vs).png]] | | style="text-align:center;"|[[File:Mercenary Camp (vs).png|Mercenary Camp (vs).png|link=]] | ||
|- | |- | ||
| style="text-align:center;"|[[File: Mermaids.gif|Mermaids|link=Mermaids]] | | style="text-align:center;"|[[File: Mermaids.gif|Mermaids|link=Mermaids]] | ||
| Line 405: | Line 405: | ||
| style="text-align:center;"|Unlimited | | style="text-align:center;"|Unlimited | ||
| style="text-align:center;"| 100 | | style="text-align:center;"| 100 | ||
| style="text-align:center;"|[[File:Mermaids (vs).png|Mermaids (vs).png]] | | style="text-align:center;"|[[File:Mermaids (vs).png|Mermaids (vs).png|link=]] | ||
|- | |- | ||
| style="text-align:center;"|[[File: Monolith One Way Entrance1.gif|Monolith One Way Entrance|link=Monolith One Way Entrance]] [[File: Monolith One Way Entrance5.gif|Monolith One Way Entrance|link=Monolith One Way Entrance]] | | style="text-align:center;"|[[File: Monolith One Way Entrance1.gif|Monolith One Way Entrance|link=Monolith One Way Entrance]] [[File: Monolith One Way Entrance5.gif|Monolith One Way Entrance|link=Monolith One Way Entrance]] | ||
| Line 411: | Line 411: | ||
| style="text-align:center;"|Unlimited | | style="text-align:center;"|Unlimited | ||
| style="text-align:center;"| - | | style="text-align:center;"| - | ||
| style="text-align:center;"|[[File:Monolith One Way (vs).png|Monolith One Way (vs).png]] | | style="text-align:center;"|[[File:Monolith One Way (vs).png|Monolith One Way (vs).png|link=]] | ||
|- | |- | ||
| style="text-align:center;"|[[File: Monolith One Way Exit1.gif|Monolith One Way Exit|link=Monolith One Way Exit]] [[File: Monolith One Way Exit5.gif|Monolith One Way Exit|link=Monolith One Way Exit]] | | style="text-align:center;"|[[File: Monolith One Way Exit1.gif|Monolith One Way Exit|link=Monolith One Way Exit]] [[File: Monolith One Way Exit5.gif|Monolith One Way Exit|link=Monolith One Way Exit]] | ||
| Line 417: | Line 417: | ||
| style="text-align:center;"|Unlimited | | style="text-align:center;"|Unlimited | ||
| style="text-align:center;"| - | | style="text-align:center;"| - | ||
| style="text-align:center;"|[[File:Monolith One Way 2 (vs).png|Monolith One Way 2 (vs).png]] | | style="text-align:center;"|[[File:Monolith One Way 2 (vs).png|Monolith One Way 2 (vs).png|link=]] | ||
|- | |- | ||
| style="text-align:center;"|[[File: Monolith Two Way2.gif|Monolith Two Way|link=Monolith Two Way]] [[File: Monolith Two Way5.gif|Monolith Two Way|link=Monolith Two Way]] | | style="text-align:center;"|[[File: Monolith Two Way2.gif|Monolith Two Way|link=Monolith Two Way]] [[File: Monolith Two Way5.gif|Monolith Two Way|link=Monolith Two Way]] | ||
| Line 423: | Line 423: | ||
| style="text-align:center;"|Unlimited | | style="text-align:center;"|Unlimited | ||
| style="text-align:center;"| - | | style="text-align:center;"| - | ||
| style="text-align:center;"|[[File:Monolith Two Way 2 (vs).png|Monolith Two Way 2 (vs).png]] | | style="text-align:center;"|[[File:Monolith Two Way 2 (vs).png|Monolith Two Way 2 (vs).png|link=]] | ||
|- | |- | ||
| style="text-align:center;"|[[File: Mystical Garden.gif|Mystical Garden|link=Mystical Garden]] | | style="text-align:center;"|[[File: Mystical Garden.gif|Mystical Garden|link=Mystical Garden]] | ||
| Line 429: | Line 429: | ||
| style="text-align:center;"|32 | | style="text-align:center;"|32 | ||
| style="text-align:center;"| 500 | | style="text-align:center;"| 500 | ||
| style="text-align:center;"|[[File:Mystical Garden (vs).png|Mystical Garden (vs).png]] | | style="text-align:center;"|[[File:Mystical Garden (vs).png|Mystical Garden (vs).png|link=]] | ||
|- | |- | ||
| style="text-align:center;"|[[File: Naga Bank.gif|Naga Bank|link=Naga Bank]] | | style="text-align:center;"|[[File: Naga Bank.gif|Naga Bank|link=Naga Bank]] | ||
| Line 435: | Line 435: | ||
| style="text-align:center;"|Unlimited | | style="text-align:center;"|Unlimited | ||
| style="text-align:center;"| 3000 | | style="text-align:center;"| 3000 | ||
| style="text-align:center;"|[[File:Naga Bank (vs).png|Naga Bank (vs).png]] | | style="text-align:center;"|[[File:Naga Bank (vs).png|Naga Bank (vs).png|link=]] | ||
|- | |- | ||
| style="text-align:center;"|[[File: Oasis.gif|Oasis|link=Oasis]] | | style="text-align:center;"|[[File: Oasis.gif|Oasis|link=Oasis]] | ||
| Line 441: | Line 441: | ||
| style="text-align:center;"|Unlimited | | style="text-align:center;"|Unlimited | ||
| style="text-align:center;"| 100 | | style="text-align:center;"| 100 | ||
| style="text-align:center;"|[[File:Oasis (vs).png|Oasis (vs).png]] | | style="text-align:center;"|[[File:Oasis (vs).png|Oasis (vs).png|link=]] | ||
|- | |- | ||
| style="text-align:center;"|[[File: Obelisk (8in1).gif|Obelisk|link=Obelisk]] | | style="text-align:center;"|[[File: Obelisk (8in1).gif|Obelisk|link=Obelisk]] | ||
| Line 447: | Line 447: | ||
| style="text-align:center;"|48 | | style="text-align:center;"|48 | ||
| style="text-align:center;"| 3500 | | style="text-align:center;"| 3500 | ||
| style="text-align:center;"|[[File:Obelisk (vs).png|Obelisk (vs).png]] | | style="text-align:center;"|[[File:Obelisk (vs).png|Obelisk (vs).png|link=]] | ||
|- | |- | ||
| style="text-align:center;"|[[File: Ocean Bottle.gif|Ocean Bottle|link=Ocean Bottle]] | | style="text-align:center;"|[[File: Ocean Bottle.gif|Ocean Bottle|link=Ocean Bottle]] | ||
| Line 453: | Line 453: | ||
| style="text-align:center;"|128 <span style="font-size: 90%;">(all [[sign]]s and [[ocean bottle]]s)</span> | | style="text-align:center;"|128 <span style="font-size: 90%;">(all [[sign]]s and [[ocean bottle]]s)</span> | ||
| style="text-align:center;"| - | | style="text-align:center;"| - | ||
| style="text-align:center;"|[[File:Ocean Bottle (vs).png|Ocean Bottle (vs).png]] | | style="text-align:center;"|[[File:Ocean Bottle (vs).png|Ocean Bottle (vs).png|link=]] | ||
|- | |- | ||
| style="text-align:center;"|[[File: Ore Pit.gif|Ore Pit|link=Ore Pit]] | | style="text-align:center;"|[[File: Ore Pit.gif|Ore Pit|link=Ore Pit]] | ||
| Line 459: | Line 459: | ||
| style="text-align:center;"| 144 <span style="font-size: 90%;">(all [[mines]] and [[lighthouse]]s)</span> | | style="text-align:center;"| 144 <span style="font-size: 90%;">(all [[mines]] and [[lighthouse]]s)</span> | ||
| style="text-align:center;"| 1500 | | style="text-align:center;"| 1500 | ||
| style="text-align:center;"|[[File:Ore Pit (vs).png|Ore Pit (vs).png]] | | style="text-align:center;"|[[File:Ore Pit (vs).png|Ore Pit (vs).png|link=]] | ||
|- | |- | ||
| style="text-align:center;"|[[File: Prison.gif|Prison|link=Prison]] | | style="text-align:center;"|[[File: Prison.gif|Prison|link=Prison]] | ||
| Line 465: | Line 465: | ||
| style="text-align:center;"|144 | | style="text-align:center;"|144 | ||
| style="text-align:center;"| 2500 - Hero 1 lvl<br> 5000 - Hero 5 lvl<br>10000 - Hero 10 lvl<br>20000 - Hero 20 lvl<br>30000 - Hero 30 lvl<br> | | style="text-align:center;"| 2500 - Hero 1 lvl<br> 5000 - Hero 5 lvl<br>10000 - Hero 10 lvl<br>20000 - Hero 20 lvl<br>30000 - Hero 30 lvl<br> | ||
| style="text-align:center;"|[[File:Prison (vs).png|Prison (vs).png]] | | style="text-align:center;"|[[File:Prison (vs).png|Prison (vs).png|link=]] | ||
|- | |- | ||
| style="text-align:center;"|[[File: Pandora's Box.gif|Pandora's Box|link=Pandora's Box]] | | style="text-align:center;"|[[File: Pandora's Box.gif|Pandora's Box|link=Pandora's Box]] | ||
| Line 471: | Line 471: | ||
| style="text-align:center;"|200 | | style="text-align:center;"|200 | ||
| style="text-align:center;"| Various | | style="text-align:center;"| Various | ||
| style="text-align:center;"|[[File:Pandora's Box (vs).png|Pandora's Box (vs).png]] | | style="text-align:center;"|[[File:Pandora's Box (vs).png|Pandora's Box (vs).png|link=]] | ||
|- | |- | ||
| style="text-align:center;"|[[File: Pillar of Fire.gif|Pillar of Fire|link=Pillar of Fire]] | | style="text-align:center;"|[[File: Pillar of Fire.gif|Pillar of Fire|link=Pillar of Fire]] | ||
| Line 477: | Line 477: | ||
| style="text-align:center;"|Unlimited | | style="text-align:center;"|Unlimited | ||
| style="text-align:center;"| 750 | | style="text-align:center;"| 750 | ||
| style="text-align:center;"|[[File:Pillar of Fire (vs).png|Pillar of Fire (vs).png]] | | style="text-align:center;"|[[File:Pillar of Fire (vs).png|Pillar of Fire (vs).png|link=]] | ||
|- | |- | ||
| style="text-align:center;"|[[File: Pyramid.gif|Pyramid|link=Pyramid]] | | style="text-align:center;"|[[File: Pyramid.gif|Pyramid|link=Pyramid]] | ||
| Line 483: | Line 483: | ||
| style="text-align:center;"|Unlimited | | style="text-align:center;"|Unlimited | ||
| style="text-align:center;"| 5000 | | style="text-align:center;"| 5000 | ||
| style="text-align:center;"|[[File:Pyramid (vs).png|Pyramid (vs).png]] | | style="text-align:center;"|[[File:Pyramid (vs).png|Pyramid (vs).png|link=]] | ||
|- | |- | ||
| style="text-align:center;"|[[File: Quest Guard.gif|Quest Guard|link=Quest Guard]] | | style="text-align:center;"|[[File: Quest Guard.gif|Quest Guard|link=Quest Guard]] | ||
| Line 489: | Line 489: | ||
| style="text-align:center;"|Unlimited | | style="text-align:center;"|Unlimited | ||
| style="text-align:center;"| - | | style="text-align:center;"| - | ||
| style="text-align:center;"|[[File:Quest Guard (vs).png|Quest Guard (vs).png]] | | style="text-align:center;"|[[File:Quest Guard (vs).png|Quest Guard (vs).png|link=]] | ||
|- | |- | ||
| style="text-align:center;"|[[File: Rally Flag.gif|Rally Flag|link=Rally Flag]] | | style="text-align:center;"|[[File: Rally Flag.gif|Rally Flag|link=Rally Flag]] | ||
| Line 495: | Line 495: | ||
| style="text-align:center;"|Unlimited | | style="text-align:center;"|Unlimited | ||
| style="text-align:center;"| 100 | | style="text-align:center;"| 100 | ||
| style="text-align:center;"|[[File:Rally Flag (vs).png|Rally Flag (vs).png]] | | style="text-align:center;"|[[File:Rally Flag (vs).png|Rally Flag (vs).png|link=]] | ||
|- | |- | ||
| style="text-align:center;"|[[File: Redwood Observatory.gif|Redwood Observatory|link=Redwood Observatory]] | | style="text-align:center;"|[[File: Redwood Observatory.gif|Redwood Observatory|link=Redwood Observatory]] | ||
| Line 501: | Line 501: | ||
| style="text-align:center;"|Unlimited | | style="text-align:center;"|Unlimited | ||
| style="text-align:center;"| 750 | | style="text-align:center;"| 750 | ||
| style="text-align:center;"|[[File:Redwood Observatory (vs).png|x96px]] | | style="text-align:center;"|[[File:Redwood Observatory (vs).png|link=|x96px]] | ||
|- | |- | ||
| style="text-align:center;"|[[File: Refugee Camp.gif|Refugee Camp|link=Refugee Camp]] | | style="text-align:center;"|[[File: Refugee Camp.gif|Refugee Camp|link=Refugee Camp]] | ||
| Line 507: | Line 507: | ||
| style="text-align:center;"|Unlimited | | style="text-align:center;"|Unlimited | ||
| style="text-align:center;"| 5000 | | style="text-align:center;"| 5000 | ||
| style="text-align:center;"|[[File:Refugee Camp (vs).png|Refugee Camp (vs).png]] | | style="text-align:center;"|[[File:Refugee Camp (vs).png|Refugee Camp (vs).png|link=]] | ||
|- | |- | ||
| style="text-align:center;"|[[File: Resource wood.png|Resources|link=Resource]] [[File: Resource ore.png|Resources|link=Resource]] [[File: Resource sulfur.png|Resources|link=Resource]] [[File: Resource mercury.png|Resources|link=Resource]] [[File: Resource crystal.gif|Resources|link=Resource]] [[File: Resource gem.gif|Resources|link=Resource]] [[File: Resource gold.gif|Resources|link=Resource]] | | style="text-align:center;"|[[File: Resource wood.png|Resources|link=Resource]] [[File: Resource ore.png|Resources|link=Resource]] [[File: Resource sulfur.png|Resources|link=Resource]] [[File: Resource mercury.png|Resources|link=Resource]] [[File: Resource crystal.gif|Resources|link=Resource]] [[File: Resource gem.gif|Resources|link=Resource]] [[File: Resource gold.gif|Resources|link=Resource]] | ||
| Line 513: | Line 513: | ||
| style="text-align:center;"|Unlimited | | style="text-align:center;"|Unlimited | ||
| style="text-align:center;"| 750 - Gold<br>1400 - Wood and Ore<br>1500 - Random<br>2000 - Mercury, Sulfur, Crystal, Gems | | style="text-align:center;"| 750 - Gold<br>1400 - Wood and Ore<br>1500 - Random<br>2000 - Mercury, Sulfur, Crystal, Gems | ||
| style="text-align:center;"|[[File:Resource (vs).png|Resource (vs).png]] | | style="text-align:center;"|[[File:Resource (vs).png|Resource (vs).png|link=]] | ||
|- | |- | ||
| style="text-align:center;"|[[File: Sanctuary.gif|Sanctuary|link=Sanctuary]] | | style="text-align:center;"|[[File: Sanctuary.gif|Sanctuary|link=Sanctuary]] | ||
| Line 519: | Line 519: | ||
| style="text-align:center;"|Unlimited | | style="text-align:center;"|Unlimited | ||
| style="text-align:center;"| 100 | | style="text-align:center;"| 100 | ||
| style="text-align:center;"|[[File:Sanctuary (vs).png|Sanctuary (vs).png]] | | style="text-align:center;"|[[File:Sanctuary (vs).png|Sanctuary (vs).png|link=]] | ||
|- | |- | ||
| style="text-align:center;"|[[File: Sawmill.gif|Sawmill|link=Sawmill]] | | style="text-align:center;"|[[File: Sawmill.gif|Sawmill|link=Sawmill]] | ||
| Line 525: | Line 525: | ||
| style="text-align:center;"| 144 <span style="font-size: 90%;">(all [[mines]] and [[lighthouse]]s)</span> | | style="text-align:center;"| 144 <span style="font-size: 90%;">(all [[mines]] and [[lighthouse]]s)</span> | ||
| style="text-align:center;"| 1500 | | style="text-align:center;"| 1500 | ||
| style="text-align:center;"|[[File:Sawmill (vs).png|Sawmill (vs).png]] | | style="text-align:center;"|[[File:Sawmill (vs).png|Sawmill (vs).png|link=]] | ||
|- | |- | ||
| style="text-align:center;"|[[File: Scholar.gif|Scholar (Adventure Map)|link=Scholar (Adventure Map)]] | | style="text-align:center;"|[[File: Scholar.gif|Scholar (Adventure Map)|link=Scholar (Adventure Map)]] | ||
| Line 531: | Line 531: | ||
| style="text-align:center;"|Unlimited | | style="text-align:center;"|Unlimited | ||
| style="text-align:center;"| 1500 | | style="text-align:center;"| 1500 | ||
| style="text-align:center;"|[[File:Scholar (vs).png|Scholar (vs).png]] | | style="text-align:center;"|[[File:Scholar (vs).png|Scholar (vs).png|link=]] | ||
|- | |- | ||
| style="text-align:center;"|[[File: School of Magic.gif|School of Magic|link=School of Magic]] | | style="text-align:center;"|[[File: School of Magic.gif|School of Magic|link=School of Magic]] | ||
| Line 537: | Line 537: | ||
| style="text-align:center;"|32 | | style="text-align:center;"|32 | ||
| style="text-align:center;"| 1000 | | style="text-align:center;"| 1000 | ||
| style="text-align:center;"|[[File:School of Magic (vs).png|x80px]] | | style="text-align:center;"|[[File:School of Magic (vs).png|link=|x80px]] | ||
|- | |- | ||
| style="text-align:center;"|[[File: School of War.gif|School of War|link=School of War]] | | style="text-align:center;"|[[File: School of War.gif|School of War|link=School of War]] | ||
| Line 543: | Line 543: | ||
| style="text-align:center;"|32 | | style="text-align:center;"|32 | ||
| style="text-align:center;"| 1000 | | style="text-align:center;"| 1000 | ||
| style="text-align:center;"|[[File:School of War (vs).png|School of War (vs).png]] | | style="text-align:center;"|[[File:School of War (vs).png|School of War (vs).png|link=]] | ||
|- | |- | ||
| style="text-align:center;"|[[File: Sea Chest.gif|Sea Chest|link=Sea Chest]] | | style="text-align:center;"|[[File: Sea Chest.gif|Sea Chest|link=Sea Chest]] | ||
| Line 549: | Line 549: | ||
| style="text-align:center;"|Unlimited | | style="text-align:center;"|Unlimited | ||
| style="text-align:center;"| 1500 | | style="text-align:center;"| 1500 | ||
| style="text-align:center;"|[[File:Sea Chest (vs).png|Sea Chest (vs).png]] | | style="text-align:center;"|[[File:Sea Chest (vs).png|Sea Chest (vs).png|link=]] | ||
|- | |- | ||
| style="text-align:center;"|[[File: Seer's Hut 2.gif|Seer's Hut|link=Seer's Hut]][[File: Seer's Hut 3.gif|Seer's Hut|link=Seer's Hut]][[File: Seer's Hut 1.gif|Seer's Hut|link=Seer's Hut]] | | style="text-align:center;"|[[File: Seer's Hut 2.gif|Seer's Hut|link=Seer's Hut]][[File: Seer's Hut 3.gif|Seer's Hut|link=Seer's Hut]][[File: Seer's Hut 1.gif|Seer's Hut|link=Seer's Hut]] | ||
| Line 555: | Line 555: | ||
| style="text-align:center;"|48 | | style="text-align:center;"|48 | ||
| style="text-align:center;"| Various | | style="text-align:center;"| Various | ||
| style="text-align:center;"|[[File:Seer's Hut (vs).png|Seer's Hut (vs).png]] | | style="text-align:center;"|[[File:Seer's Hut (vs).png|Seer's Hut (vs).png|link=]] | ||
|- | |- | ||
| style="text-align:center;"|[[File:Shipwreck Survivor.gif|Shipwreck Survivor|link=Shipwreck Survivor]] | | style="text-align:center;"|[[File:Shipwreck Survivor.gif|Shipwreck Survivor|link=Shipwreck Survivor]] | ||
| Line 561: | Line 561: | ||
| style="text-align:center;"|Unlimited | | style="text-align:center;"|Unlimited | ||
| style="text-align:center;"| 1500 | | style="text-align:center;"| 1500 | ||
| style="text-align:center;"|[[File:Shipwreck Survivor (vs).png|Shipwreck Survivor (vs).png]] | | style="text-align:center;"|[[File:Shipwreck Survivor (vs).png|Shipwreck Survivor (vs).png|link=]] | ||
|- | |- | ||
| style="text-align:center;"|[[File: Shipwreck 1.gif|Shipwreck|link=Shipwreck]][[File: Shipwreck 2.gif|Shipwreck|link=Shipwreck]] | | style="text-align:center;"|[[File: Shipwreck 1.gif|Shipwreck|link=Shipwreck]][[File: Shipwreck 2.gif|Shipwreck|link=Shipwreck]] | ||
| Line 573: | Line 573: | ||
| style="text-align:center;"|Unlimited | | style="text-align:center;"|Unlimited | ||
| style="text-align:center;"| - | | style="text-align:center;"| - | ||
| style="text-align:center;"|[[File:Shipyard (vs).png|Shipyard (vs).png]] | | style="text-align:center;"|[[File:Shipyard (vs).png|Shipyard (vs).png|link=]] | ||
|- | |- | ||
| style="text-align:center;"|[[File: Shrine of Magic Incantation.gif|Shrine of Magic Incantation|link=Shrine of Magic Incantation]] | | style="text-align:center;"|[[File: Shrine of Magic Incantation.gif|Shrine of Magic Incantation|link=Shrine of Magic Incantation]] | ||
| Line 579: | Line 579: | ||
| style="text-align:center;"|32 | | style="text-align:center;"|32 | ||
| style="text-align:center;"| 500 | | style="text-align:center;"| 500 | ||
| style="text-align:center;"|[[File:Shrine (vs).png|Shrine (vs).png]] | | style="text-align:center;"|[[File:Shrine (vs).png|Shrine (vs).png|link=]] | ||
|- | |- | ||
| style="text-align:center;"|[[File: Shrine of Magic Gesture.gif|Shrine of Magic Gesture|link=Shrine of Magic Gesture]] | | style="text-align:center;"|[[File: Shrine of Magic Gesture.gif|Shrine of Magic Gesture|link=Shrine of Magic Gesture]] | ||
| Line 585: | Line 585: | ||
| style="text-align:center;"|32 | | style="text-align:center;"|32 | ||
| style="text-align:center;"| 2000 | | style="text-align:center;"| 2000 | ||
| style="text-align:center;"|[[File:Shrine2 (vs).png|Shrine2 (vs).png]] | | style="text-align:center;"|[[File:Shrine2 (vs).png|Shrine2 (vs).png|link=]] | ||
|- | |- | ||
| style="text-align:center;"|[[File: Shrine of Magic Thought.gif|Shrine of Magic Thought|link=Shrine of Magic Thought]] | | style="text-align:center;"|[[File: Shrine of Magic Thought.gif|Shrine of Magic Thought|link=Shrine of Magic Thought]] | ||
| Line 591: | Line 591: | ||
| style="text-align:center;"|32 | | style="text-align:center;"|32 | ||
| style="text-align:center;"| 3000 | | style="text-align:center;"| 3000 | ||
| style="text-align:center;"|[[File:Shrine3 (vs).png|Shrine3 (vs).png]] | | style="text-align:center;"|[[File:Shrine3 (vs).png|Shrine3 (vs).png|link=]] | ||
|- | |- | ||
| style="text-align:center;"|[[File: Sign.gif|Sign|link=Sign]] | | style="text-align:center;"|[[File: Sign.gif|Sign|link=Sign]] | ||
| Line 597: | Line 597: | ||
| style="text-align:center;"|128 <span style="font-size: 90%;">(all [[sign]]s and [[ocean bottle]]s)</span> | | style="text-align:center;"|128 <span style="font-size: 90%;">(all [[sign]]s and [[ocean bottle]]s)</span> | ||
| style="text-align:center;"| - | | style="text-align:center;"| - | ||
| style="text-align:center;"|[[File:Sign (vs).png|Sign (vs).png]] | | style="text-align:center;"|[[File:Sign (vs).png|Sign (vs).png|link=]] | ||
|- | |- | ||
| style="text-align:center;"|[[File: Sirens.gif|Sirens|link=Sirens]] | | style="text-align:center;"|[[File: Sirens.gif|Sirens|link=Sirens]] | ||
| Line 603: | Line 603: | ||
| style="text-align:center;"|32 | | style="text-align:center;"|32 | ||
| style="text-align:center;"| 100 | | style="text-align:center;"| 100 | ||
| style="text-align:center;"|[[File:Sirens (vs).png|Sirens (vs).png]] | | style="text-align:center;"|[[File:Sirens (vs).png|Sirens (vs).png|link=]] | ||
|- | |- | ||
| style="text-align:center;"|[[File: Spell Scroll artifact.gif|link=Spell Scroll]] | | style="text-align:center;"|[[File: Spell Scroll artifact.gif|link=Spell Scroll]] | ||
| Line 609: | Line 609: | ||
| style="text-align:center;"|Unlimited | | style="text-align:center;"|Unlimited | ||
| style="text-align:center;"| 500 - 1st lvl<br>2000 - 2nd lvl<br>3000 - 3rd lvl<br>4000 - 4th lvl<br>5000 - 5th lvl | | style="text-align:center;"| 500 - 1st lvl<br>2000 - 2nd lvl<br>3000 - 3rd lvl<br>4000 - 4th lvl<br>5000 - 5th lvl | ||
| style="text-align:center;"|[[File:Spell Scroll (vs).png|Spell Scroll (vs).png]] | | style="text-align:center;"|[[File:Spell Scroll (vs).png|Spell Scroll (vs).png|link=]] | ||
|- | |- | ||
| style="text-align:center;"|[[File: Stables.gif|Stables|link=Stables]] | | style="text-align:center;"|[[File: Stables.gif|Stables|link=Stables]] | ||
| Line 615: | Line 615: | ||
| style="text-align:center;"|Unlimited | | style="text-align:center;"|Unlimited | ||
| style="text-align:center;"| 200 | | style="text-align:center;"| 200 | ||
| style="text-align:center;"|[[File:Stables (vs).png|Stables (vs).png]] | | style="text-align:center;"|[[File:Stables (vs).png|Stables (vs).png|link=]] | ||
|- | |- | ||
| style="text-align:center;"|[[File: Star Axis.gif|Star Axis|link=Star Axis]] | | style="text-align:center;"|[[File: Star Axis.gif|Star Axis|link=Star Axis]] | ||
| Line 621: | Line 621: | ||
| style="text-align:center;"|32 | | style="text-align:center;"|32 | ||
| style="text-align:center;"| 1500 | | style="text-align:center;"| 1500 | ||
| style="text-align:center;"|[[File:Star Axis (vs).png|Star Axis (vs).png]] | | style="text-align:center;"|[[File:Star Axis (vs).png|Star Axis (vs).png|link=]] | ||
|- | |- | ||
| style="text-align:center;"|[[File: Subterranean Gate.gif|Subterranean Gate|link=Subterranean Gate]] | | style="text-align:center;"|[[File: Subterranean Gate.gif|Subterranean Gate|link=Subterranean Gate]] | ||
| Line 627: | Line 627: | ||
| style="text-align:center;"|Unlimited | | style="text-align:center;"|Unlimited | ||
| style="text-align:center;"| - | | style="text-align:center;"| - | ||
| style="text-align:center;"|[[File:Subterranean Gate (vs).png|Subterranean Gate (vs).png]] | | style="text-align:center;"|[[File:Subterranean Gate (vs).png|Subterranean Gate (vs).png|link=]] | ||
|- | |- | ||
| style="text-align:center;"|[[File: Sulfur Dune.gif|Sulfur Dune|link=Sulfur Dune]] | | style="text-align:center;"|[[File: Sulfur Dune.gif|Sulfur Dune|link=Sulfur Dune]] | ||
| Line 633: | Line 633: | ||
| style="text-align:center;"| 144 <span style="font-size: 90%;">(all [[mines]] and [[lighthouse]]s)</span> | | style="text-align:center;"| 144 <span style="font-size: 90%;">(all [[mines]] and [[lighthouse]]s)</span> | ||
| style="text-align:center;"| 3500 | | style="text-align:center;"| 3500 | ||
| style="text-align:center;"|[[File:Sulfur Dune (vs).png|Sulfur Dune (vs).png]] | | style="text-align:center;"|[[File:Sulfur Dune (vs).png|Sulfur Dune (vs).png|link=]] | ||
|- | |- | ||
| style="text-align:center;"|[[File: Swan Pond.gif|Swan Pond|link=Swan Pond]] | | style="text-align:center;"|[[File: Swan Pond.gif|Swan Pond|link=Swan Pond]] | ||
| Line 639: | Line 639: | ||
| style="text-align:center;"|Unlimited | | style="text-align:center;"|Unlimited | ||
| style="text-align:center;"| 100 | | style="text-align:center;"| 100 | ||
| style="text-align:center;"|[[File:Swan Pond (vs).png|Swan Pond (vs).png]] | | style="text-align:center;"|[[File:Swan Pond (vs).png|Swan Pond (vs).png|link=]] | ||
|- | |- | ||
| style="text-align:center;"|[[File: Tavern.gif|Tavern|link=Tavern]] | | style="text-align:center;"|[[File: Tavern.gif|Tavern|link=Tavern]] | ||
| Line 645: | Line 645: | ||
| style="text-align:center;"|Unlimited | | style="text-align:center;"|Unlimited | ||
| style="text-align:center;"| 100 | | style="text-align:center;"| 100 | ||
| style="text-align:center;"|[[File:Tavern (vs).png|x110px]] | | style="text-align:center;"|[[File:Tavern (vs).png|link=|x110px]] | ||
|- | |- | ||
| style="text-align:center;"|[[File: Temple.gif|Temple|link=Temple]] | | style="text-align:center;"|[[File: Temple.gif|Temple|link=Temple]] | ||
| Line 651: | Line 651: | ||
| style="text-align:center;"|Unlimited | | style="text-align:center;"|Unlimited | ||
| style="text-align:center;"| 100 | | style="text-align:center;"| 100 | ||
| style="text-align:center;"|[[File:Temple (vs).png|Temple (vs).png]] | | style="text-align:center;"|[[File:Temple (vs).png|Temple (vs).png|link=]] | ||
|- | |- | ||
| style="text-align:center;"|[[File: Towns (9in1).gif|Town|link=Town]] | | style="text-align:center;"|[[File: Towns (9in1).gif|Town|link=Town]] | ||
| Line 663: | Line 663: | ||
| style="text-align:center;"|Unlimited | | style="text-align:center;"|Unlimited | ||
| style="text-align:center;"| 100 | | style="text-align:center;"| 100 | ||
| style="text-align:center;"|[[File:Trading Post (vs).png|Trading Post (vs).png]] | | style="text-align:center;"|[[File:Trading Post (vs).png|Trading Post (vs).png|link=]] | ||
|- | |- | ||
| style="text-align:center;"|[[File: Treasure Chest.gif|Treasure Chest|link=Treasure Chest]] | | style="text-align:center;"|[[File: Treasure Chest.gif|Treasure Chest|link=Treasure Chest]] | ||
| Line 669: | Line 669: | ||
| style="text-align:center;"|Unlimited | | style="text-align:center;"|Unlimited | ||
| style="text-align:center;"| 1500 | | style="text-align:center;"| 1500 | ||
| style="text-align:center;"|[[File:Treasure Chest (vs).png|Treasure Chest (vs).png]] | | style="text-align:center;"|[[File:Treasure Chest (vs).png|Treasure Chest (vs).png|link=]] | ||
|- | |- | ||
| style="text-align:center;"|[[File: Tree of Knowledge.gif|Tree of Knowledge|link=Tree of Knowledge]] | | style="text-align:center;"|[[File: Tree of Knowledge.gif|Tree of Knowledge|link=Tree of Knowledge]] | ||
| Line 675: | Line 675: | ||
| style="text-align:center;"|32 | | style="text-align:center;"|32 | ||
| style="text-align:center;"| 2500 | | style="text-align:center;"| 2500 | ||
| style="text-align:center;"|[[File:Tree of Knowledge (vs).png|Tree of Knowledge (vs).png]] | | style="text-align:center;"|[[File:Tree of Knowledge (vs).png|Tree of Knowledge (vs).png|link=]] | ||
|- | |- | ||
| style="text-align:center;"|[[File: University.gif|University|link=University]] | | style="text-align:center;"|[[File: University.gif|University|link=University]] | ||
| Line 681: | Line 681: | ||
| style="text-align:center;"|32 | | style="text-align:center;"|32 | ||
| style="text-align:center;"| 2500 | | style="text-align:center;"| 2500 | ||
| style="text-align:center;"|[[File:University (vs).png|University (vs).png]] | | style="text-align:center;"|[[File:University (vs).png|University (vs).png|link=]] | ||
|- | |- | ||
| style="text-align:center;"|[[File: Wagon.gif|Wagon|link=Wagon]] | | style="text-align:center;"|[[File: Wagon.gif|Wagon|link=Wagon]] | ||
| Line 688: | Line 688: | ||
| style="text-align:center;"|32 | | style="text-align:center;"|32 | ||
| style="text-align:center;"| 500 | | style="text-align:center;"| 500 | ||
| style="text-align:center;"|[[File:Wagon (vs).png|Wagon (vs).png]] | | style="text-align:center;"|[[File:Wagon (vs).png|Wagon (vs).png|link=]] | ||
|- | |- | ||
| style="text-align:center;"|[[File: War Machine Factory.gif|War Machine Factory|link=War Machine Factory]] | | style="text-align:center;"|[[File: War Machine Factory.gif|War Machine Factory|link=War Machine Factory]] | ||
| Line 694: | Line 694: | ||
| style="text-align:center;"|Unlimited | | style="text-align:center;"|Unlimited | ||
| style="text-align:center;"| 1500 | | style="text-align:center;"| 1500 | ||
| style="text-align:center;"|[[File:War Machine Factory (vs).png|War Machine Factory (vs).png]] | | style="text-align:center;"|[[File:War Machine Factory (vs).png|War Machine Factory (vs).png|link=]] | ||
|- | |- | ||
| style="text-align:center;"|[[File: Warrior's Tomb.gif|Warrior's Tomb|link=Warrior's Tomb]] | | style="text-align:center;"|[[File: Warrior's Tomb.gif|Warrior's Tomb|link=Warrior's Tomb]] | ||
| Line 700: | Line 700: | ||
| style="text-align:center;"|32 | | style="text-align:center;"|32 | ||
| style="text-align:center;"| 6000 | | style="text-align:center;"| 6000 | ||
| style="text-align:center;"|[[File:Warrior's Tomb (vs).png|Warrior's Tomb (vs).png]] | | style="text-align:center;"|[[File:Warrior's Tomb (vs).png|Warrior's Tomb (vs).png|link=]] | ||
|- | |- | ||
| style="text-align:center;"|[[File: Water Wheel.gif|link=Water Wheel]] | | style="text-align:center;"|[[File: Water Wheel.gif|link=Water Wheel]] | ||
| Line 706: | Line 706: | ||
| style="text-align:center;"|32 | | style="text-align:center;"|32 | ||
| style="text-align:center;"| 750 | | style="text-align:center;"| 750 | ||
| style="text-align:center;"|[[File:Water Wheel (vs).png|Water Wheel (vs).png]] | | style="text-align:center;"|[[File:Water Wheel (vs).png|Water Wheel (vs).png|link=]] | ||
|- | |- | ||
| style="text-align:center;"|[[File: Watering Hole.gif|link=Watering Hole]] | | style="text-align:center;"|[[File: Watering Hole.gif|link=Watering Hole]] | ||
| Line 712: | Line 712: | ||
| style="text-align:center;"|Unlimited | | style="text-align:center;"|Unlimited | ||
| style="text-align:center;"| 500 | | style="text-align:center;"| 500 | ||
| style="text-align:center;"|[[File:Watering Hole (vs).png|Watering Hole (vs).png]] | | style="text-align:center;"|[[File:Watering Hole (vs).png|Watering Hole (vs).png|x70px|link=]] | ||
|- | |- | ||
| style="text-align:center;"|[[File: Whirlpool.gif|link=Whirlpool]] | | style="text-align:center;"|[[File: Whirlpool.gif|link=Whirlpool]] | ||
| Line 718: | Line 718: | ||
| style="text-align:center;"|Unlimited | | style="text-align:center;"|Unlimited | ||
| style="text-align:center;"| - | | style="text-align:center;"| - | ||
| style="text-align:center;"|[[File:Whirlpool (vs).png|Whirlpool (vs).png]] | | style="text-align:center;"|[[File:Whirlpool (vs).png|Whirlpool (vs).png|link=]] | ||
|- | |- | ||
| style="text-align:center;"|[[File: Windmill.gif|Windmill|link=Windmill]] | | style="text-align:center;"|[[File: Windmill.gif|Windmill|link=Windmill]] | ||
| Line 724: | Line 724: | ||
| style="text-align:center;"|32 | | style="text-align:center;"|32 | ||
| style="text-align:center;"| 2500 | | style="text-align:center;"| 2500 | ||
| style="text-align:center;"|[[File:Windmill (vs).png|x96px]] | | style="text-align:center;"|[[File:Windmill (vs).png|link=|x96px]] | ||
|- | |- | ||
| style="text-align:center;"|[[File: Witch Hut.gif|Witch Hut|link=Witch Hut]] | | style="text-align:center;"|[[File: Witch Hut.gif|Witch Hut|link=Witch Hut]] | ||
| Line 730: | Line 730: | ||
| style="text-align:center;"|32 | | style="text-align:center;"|32 | ||
| style="text-align:center;"| 1500 | | style="text-align:center;"| 1500 | ||
| style="text-align:center;"|[[File:Witch Hut (vs).png|x88px]] | | style="text-align:center;"|[[File:Witch Hut (vs).png|link=|x88px]] | ||
|} | |} | ||
Revision as of 07:14, 28 August 2018
List of adventure map objects Horn of the Abyss
| Picture | Adventure map object | Maximum number in map | Randomly generated map value | Visiting Scheme |
|---|---|---|---|---|

|
Experimental Shop: Creature bank guarded by 30% : 30% : 30% : 10% : |
32 | 3500 | 
|

|
Wolf Raider Picket: Creature bank guarded by 30% : 30% : 30% : 10% : |
9500 | 
| |
|
Red Tower: Creature bank guarded by 30% : 30% : 30% : 10% : 50% probability for 1/5 of the guards to be Energy Elementals. |
4000 | 
| |
|
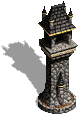
Black Tower: Creature bank guarded by 30% : 30% : 30% : 10% : |
1500 | .png)
| |

|
Churchyard: Creature bank guarded by 120 Walking Dead for 2500 Visiting a previously plundered Churchyard inflicts a -1 penalty to Morale. |
1500 | .png)
| |
|
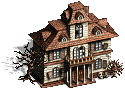
Mansion: Creature bank guarded by 30% : |
5000 | 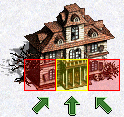
| |
|
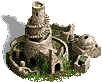
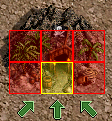
Ruins: Creature bank guarded by 30 %:
|
1000 | .png)
| |

|
Beholders' Sanctuary: Water creature bank guarded by 30% : |
2500 | 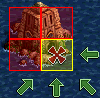
| |

|
Temple of the Sea: Water creature bank guarded by 30 %: 30 %: |
10000 | 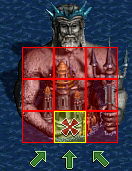
| |

|
Pirate Cavern: Creature bank guarded by 30% : 30% : 30% : 10% : 50% probability for half of Corsairs to be Sea Dogs. Does not appear on random maps unless it is enabled in the template settings. |
| ||

|
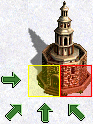
Ivory Tower: Creature bank guarded by 30% : 30% : 30% : 10% : Does not appear on random maps unless it is enabled in the template settings. |
| ||
|
Spit: Creature bank guarded by 30% : 30% : 30% : 10% : Does not appear on random maps unless it is enabled in the template settings. |
| ||
|
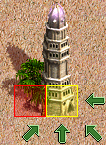
Abandoned Mine: Guarded by 100-245 Troglodytes. After being released works as a random mine (except Sawmill. Up to 7 stacks of units can be left inside of it. Combat taking place in Abandoned Mine will always use subterranean terrain with all native terrain bonuses. | 144 (all mines and lighthouses) | 
| |

|
Alchemist's Lab: Produces +1 |
144 (all mines and lighthouses) | 3500 | 
|

|
Altar of Sacrifice: Allows hero to sacrifice artifacts and/or creatures for experience. Good alignment heroes can sacrifice only artifacts, evil alignment heroes only creatures and neutral heroes can sacrifice both. | Unlimited | 100 | 
|

|
Anti-Magic Garrison: Can withhold up to seven different stacks of creatures. The garrison prevents all spellcasting during combat and in the visiting square. Anti-Magic Garrisons can be aligned both horizontally or vertically. | 48 | - | 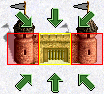
|

|
Arena: When visited, offers once for every hero to increases either their attack or defense skill +2. | 32 | 3000 | 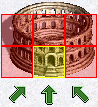
|
| Artifact: | Unlimited | 2000 - Treasure 5000 - Minor 10000 - Major 20000 - Relic |

| |

|
Black Market: Enables visiting hero to buy artifacts. | 32 | 8000 | 
|
 .gif)
|
Boat: Enables a hero to move over water tiles. | 64 | - | |

|
Border Gate: Cannot be passed unless one of the player's heroes have visited a Keymaster's Tent with the associated color. | Unlimited | - | 
|
| Border Guard: Cannot be passed unless one of the player's heroes have visited a Keymaster's Tent with the associated color. Disappears after being visited when this condition is fulfilled. | Unlimited | - | 
| |
| Buoy: Gives the visiting hero +1 morale for the next battle. | Unlimited | 100 | 
| |
| Campfire: Gives the player between 400–600 |
Unlimited | 2000 | 
| |
  
|
Cartographer: Surface, Water and Subterranean cartographers reveal all the surface, water and subterranean tiles respectively. All maps cost 10000 |
Unlimited | 10000 - Surface 7500 - Subterranean 5000 - Water |
|
| Corpse: When first visited, has 20% chance to give the hero random treasure or minor class artifact. | 32 | 500 | 
| |

|
Cover of Darkness (Adventure Map): Creates a 20 tiles-radius shroud for non-allied players when visited. | Unlimited | - | 
|

|
Creature dwelling: Enables a visiting hero to hire one type of creatures. Each creature has a different structure. Flagged dwelling increases the growth for a certain creature by 1 in home towns. Creature dwellings of level 5/6/7 are guarded by 9/6/3 non-upgraded versions of the creatures the dwelling produces (with exception of Pyre guarded by 6 Firebirds). | 144 | Various | |

|
Crypt: Creature bank guarded by 30 %: 30 %: 30 %: 10 %: When visited after the guards have been defeated decreases the hero's morale by 1 for the next battle. |
Unlimited | 1000 | 
|

|
Crystal Cavern: Produces +1 |
144 (all mines and lighthouses) | 3500 | 
|

|
Cyclops Stockpile: Creature bank guarded by 30% : 30% : 30% : 10% : 50% probability for 1/5 of the guards to be Cyclops Kings. |
Unlimited | 3000 | 
|

|
Den of Thieves: Shows full information on the relative strength of all the players (equivalent to 5 towns with a tavern). | Unlimited | 100 | 
|

|
Derelict Ship: Creature bank guarded by 30% : 30% : 30% : 10% : 50% probability for 1/5 of the guards to be Ice Elementals. When visited after the guards have been defeated decreases the hero's morale by 1 for the next battle. |
Unlimited | 4000 | 
|

|
Dragon Fly Hive: Creature bank guarded by 30% : 30% : 30% : 10% : |
Unlimited | 9000 | 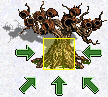
|
|
Dragon Utopia: Creature bank guarded by 30 %: 30 %: 30 %: 10 %: |
Unlimited | 10000 | 
|

|
Dwarven Treasury: Creature bank guarded by 30% : 30% : 30% : 10% : 50% probability for 1/5 of the guards to be Battle Dwarves. |
Unlimited | 2000 | 
|
| Event: An invisible characteristic of the square, that is triggered when a hero enters the square. Has multiple outcomes. | 200 | - | ||
| Eye of the Magi: Illuminates shrouded areas for players whose heroes visit a Hut of the Magi (unless there are not any heroes standing at the Eye of the Magi's placing tile). | Unlimited | - | 
| |

|
Faerie Ring: Gives a visiting hero +1 to luck for the next battle. | Unlimited | 100 | 
|
| Flotsam: An ocean object which can provide: 25% - 5 25% - 5 25% - 10 25% - nothing at all. Disappears after being visited. |
Unlimited | 500 | 
| |
| Fountain of Fortune: Gives a random amount (from -1 to +3) of luck for the visiting hero until next battle. The effect changes randomly in the first day of every week. | Unlimited | 100 | 
| |

|
Fountain of Youth: Gives visiting heroes +400 movement points until the end of the day, and +1 to morale for the next battle. | Unlimited | 100 | 
|
|
Freelancer's Guild: External analog of a Stronghold town's building. Visiting hero is able to sell creatures for resources here for the 70% of their cost (equivalent to 5 towns with marketplaces). Only the price of the creature in gold is taken into account, wood and ore have values of 250 gold per piece, magic resources have a value of 500 gold per piece (both rounded down). | Unlimited | - | 
|
| Garden of Revelation: Gives a visiting hero +1 to knowledge skill upon his first visit. | 32 | 1500 | 
| |
|
Garrison: Can withhold up to seven different stacks of creatures. Garrisons can be aligned both horizontally or vertically. | 48 | - |
|

|
Gem Pond: Produces +1 |
144 (all mines and lighthouses) | 3500 | 
|

|
Gold Mine: Produces +1000 |
144 (all mines and lighthouses) | 7000 | 
|

|
Griffin Conservatory: Creature bank guarded by 30% : 30% : 30% : 10% : 50% probability for 1/5 of the guards to be Royal Griffins. |
Unlimited | 2000 | 
|

|
Hill Fort: Offers heroes the opportunity to upgrade all creatures in the game at the cost of: 1 lvl - free, 2 lvl - 25%, 3 lvl - 50%, 4 lvl - 75%, 5-7 - 100%. | Unlimited | 7000 | 
|

|
Hut of the Magi: Reveals an area with the radius of 10 tiles around all "Eye of the Magi" objects on the adventure map. | Unlimited | - | 
|
| Idol of Fortune: Gives +1 to morale on even days and +1 to luck on odd days. On day seven it gives +1 to both. | Unlimited | 100 | 
| |

|
Imp Cache: Creature bank guarded by 30% : 30% : 30% : 10% : 50% probability for 1/5 of the guards to be Familiars. |
Unlimited | 5000 | 
|

|
Keymaster's Tent: Allows after being visited by player's heroes to pass through Border Guards and Border Gates with associated colors. | Unlimited | - | 
|
| Lean To: Gives the first visiting hero 1–5 units of resources other than gold. | 32 | 500 | 
| |
| Learning Stone: Gives visiting heroes +1000 experience upon their first visit. | 32 | 1500 | 
| |
|
Library of Enlightenment: Increases all four primary skills of visiting heroes by +2 if they have reached level 10 (8/6/4 with Basic/Advanced/Expert Diplomacy secondary skill. | 32 | 12000 | 
|

|
Lighthouses: A flaggable adventure map object that increases daily movement on water by 500 movement points per each flagged Lighthouse for all allied heroes. | 144 (all mines and lighthouses). | - | 
|

|
Magic Spring: Doubles the maximum spell points of a visiting hero and revives them to the new maximum value. Has two independent active tiles, each one of them only works once a week. | 32 | 500 | 
|
| Magic Well: A hero can restore 100% of mana reserves here once per turn. | Unlimited | 250 | 
| |

|
Market of Time: Can be found on some of the maps made with the early version of Restoration of Erathia. It appears to have no function. | - | ||

|
Marletto Tower: Gives all visiting heroes +1 to defense skill upon their first visit. | 32 | 1500 | 
|

|
Medusa Stores: Creature bank guarded by 30% : 30% : 30% : 10% : 50% probability for 1/5 of the guards to be Medusa Queens. |
Unlimited | 1500 | 
|
| Mercenary Camp: Gives all visiting heroes +1 to attack skill upon their first visit. | 32 | 1500 | 
| |

|
Mermaids: Give +1 luck for the next battle. | Unlimited | 100 | 
|

|
Monolith One Way Entrance: Teleports a hero to the exit monolith of the same type. | Unlimited | - | 
|

|
Monolith One Way Exit: Can be occupied by a hero to prevent a teleport of another hero of the same color to this exit. | Unlimited | - | 
|

|
Monolith Two Way: Teleports a hero to the monolith of the same type. Can be occupied by a hero to prevent a teleport of another hero of the same color to this monolith. | Unlimited | - | 
|

|
Mystical Garden: Brings 500 |
32 | 500 | 
|

|
Naga Bank: Creature bank guarded by 30% : 30% : 30% : 10% : 50% probability for 1/5 of the guards to be Naga Queens. ( |
Unlimited | 3000 | 
|

|
Oasis: Gives a visiting hero +800 movement points until the end of the day and +1 to morale for the next battle. Can be revisited after a battle at the same day. | Unlimited | 100 | 
|
| Obelisk: Opens a part of a Puzzle map when visited. | 48 | 3500 | 
| |
| Ocean Bottle: Contains some text - random or made by mapmaker. Disappears after being visited. | 128 (all signs and ocean bottles) | - | 
| |

|
Ore Pit: Produces +2 |
144 (all mines and lighthouses) | 1500 | 
|

|
Prison: A "loot" object that will reward you with a random hero of random level. Disappears after being visited. | 144 | 2500 - Hero 1 lvl 5000 - Hero 5 lvl 10000 - Hero 10 lvl 20000 - Hero 20 lvl 30000 - Hero 30 lvl |
|
| Pandora's Box: various effect. Disappears after being visited. | 200 | Various | 
| |

|
Pillar of Fire: Immediately reveals terrain within a 20-square radius around the hero. | Unlimited | 750 | 
|

|
Pyramid: Creature bank in which a hero can do battle with 10 Diamond Golems and 40 Gold Golems in exchange for a random level 5 spell Note: If hero does not possess expert Wisdom skill, the spell will not be learned. Visiting an empty pyramid decreases hero's luck by -2. |
Unlimited | 5000 | 
|
| Quest Guard: Does not allow a hero to pass, unless the requirements of the quest are fullfilled. | Unlimited | - | 
| |
| Rally Flag: Gives a visiting heroes +400 movement points until the end of the day and +1 to luck and morale for the next battle. | Unlimited | 100 | 
| |
| Redwood Observatory: Immediately reveals terrain within a 20-square radius around the hero. | Unlimited | 750 | 
| |
| Refugee Camp: Once per week, serves as a random dwelling where almost any creature in the game can be recruited at base creature growth and resource cost. It is not possible to find Sharpshooters, Enchanters, Azure, Crystal, Rust or Faerie Dragons in here. | Unlimited | 5000 | 
| |
| Resources: According to its type can give: 5-10 3-6 500-1000 Disappears after being visited. |
Unlimited | 750 - Gold 1400 - Wood and Ore 1500 - Random 2000 - Mercury, Sulfur, Crystal, Gems |

| |

|
Sanctuary: Visiting hero cannot be attacked by enemies (but can interact with allied heroes). | Unlimited | 100 | 
|

|
Sawmill: Produces +2 |
144 (all mines and lighthouses) | 1500 | 
|
| Scholar: Can teach a hero a random spell of any level or a secondary skill without any class limitations. If the hero already has this secondary skill, it will be upgraded to the next level. If the hero has no spell book, doesn't have high enough level of wisdom for a spell, already has an expert level of offered secondary skill or has no free skill slots, he's just getting +1 to a random Primary skill. Spell or skill can be set by the mapmaker. Offered skill cannot be rejected. Scholar disappears after being visited. | Unlimited | 1500 | 
| |
| School of Magic: A hero may gain either +1 to spell power or +1 to knowledge for a cost of 1000 |
32 | 1000 | 
| |
|
School of War: Increases hero's attack or defense (at the player's choice) by 1 for 1000 |
32 | 1000 | 
|
| Sea Chest: A water object which can give: 70% - 1500 10% - 1000 20% - nothing at all Disappears after being visited. |
Unlimited | 1500 | 
| |
  
|
Seer's Hut: It can give various types of rewards for various types of quests fulfilled. On a randomly generated PvP maps a Treasure class artifact will be requested for the exchange of gold, troops or experience. The quest item and the reward can be set by the mapmaker. | 48 | Various | 
|
| Shipwreck Survivor: The first hero who picks the survivor up from the sea recieves: 55% - Treasure 20% - Minor 20% - Major 5% - Relic class artifact. The survivor disappears after the first visit. |
Unlimited | 1500 | 
| |
 
|
Shipwreck: Water creature bank guarded by 30% : 30% : 30% : 10% : 50% probability for 1/5 of the guards to be Wraiths. When visited after the guards have been defeated decreases the hero's morale by 1 for the next battle. |
Unlimited | 2000 | .png) .png)
|

|
Shipyard: Allows players to build boats for the price of 1000 |
Unlimited | - | 
|

|
Shrine of Magic Incantation: Allows heroes to learn a 1st level spell if they have a spell book. | 32 | 500 | 
|

|
Shrine of Magic Gesture: Allows heroes to learn a 2nd level spell if they have a spell book. | 32 | 2000 | 
|

|
Shrine of Magic Thought: Allows heroes to learn a 3rd level spell if they have a spell book and basic Wisdom. | 32 | 3000 | 
|
| Signs: Contains some text - random or made by mapmaker. | 128 (all signs and ocean bottles) | - | 
| |
|
Sirens: Water object where 30% of each stack in hero's army will be turned into an experience equal to the health of the lost troops. Should be visited once for each hero, but can be revisited after the battle (bug). | 32 | 100 | 
|
| Spell Scroll: Special artifact which allows a hero to use a spell when equipped (without the required level of wisdom skill or even without the spell book for non-battle spells). | Unlimited | 500 - 1st lvl 2000 - 2nd lvl 3000 - 3rd lvl 4000 - 4th lvl 5000 - 5th lvl |

| |

|
Stables: Give the visiting hero a bonus of +400 movement points per day for the rest of the week. Can upgrade Cavaliers to Champions for free. | Unlimited | 200 | 
|
| Star Axis: Gives all visiting heroes +1 to power skill upon their first visit. | 32 | 1500 | 
| |
|
Subterranean Gate: Teleports a hero to the nearest Subterranean Gate at the opposite Layer. | Unlimited | - | 
|
| Sulfur Dune: Produces +1 |
144 (all mines and lighthouses) | 3500 | 
| |
| Swan Pond: Hero may choose to spend all remaining Movement points in exchange for a +2 boost to luck for the next battle. | Unlimited | 100 | 
| |
|
Tavern: Works as an usual Tavern in towns. Heroes can be hired here for the price of 2500 |
Unlimited | 100 | 
|

|
Temple: Gives a visiting hero the bonus to morale for the next combat. On the week's first 6 days the bonus is +1, but on 7th day the bonus is +2. | Unlimited | 100 | 
|
|
Town: An essential structure for the game, where a hero can find lots of ways to spend the time. | 48 | - | .png)
|
| Trading Post | Trading Post: Enables visiting hero to trade resources the same way the Marketplace does. The trade rate is fixed and is equal to 5 marketplaces built. | Unlimited | 100 | 
|
| Treasure Chest: A loot item which can offer: 32% - 1000 32% - 1500 31% - 2000 5% - Treasure class artifact. |
Unlimited | 1500 | 
| |

|
Tree of Knowledge: Once increases the visiting hero's experience right to the next level either for free, for 2000 |
32 | 2500 | 
|
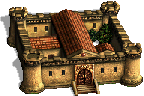
|
University teaches visiting heroes four different secondary skills to basic level for 2000 |
32 | 2500 | 
|
| Wagon may give the first visiting hero: 10% - nothing; |
32 | 500 | 
| |

|
War Machine Factory: Enables visiting hero to buy: |
Unlimited | 1500 | 
|
| Warrior's Tomb: Gives the first visiting hero: 30% - Treasure class artifact; 50% - Minor class artifact; 15% - Major class artifact; 5% - Relic class artifact. and -3 to Morale for the next battle. All the next visitors will get -3 morale. |
32 | 6000 | 
| |

|
Water Wheel: Gives a visiting hero 500 |
32 | 750 | 
|
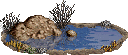
|
Watering Hole: Gives the visiting heroes +400 movement points until the end of the day and +1 morale for the next battle. | Unlimited | 500 | 
|

|
Whirlpool: transfers the hero traveling on a boat to another randomly chosen whirlpool (visiting tiles are not correlated and are chosen by random). The hero loses 50% of the weakest stack's creatures (but not the last one) unless he is wearing a Sea Captain's Hat. | Unlimited | - | 
|
|
Windmill: gives a visiting hero 3-6 of random resource (except |
32 | 2500 | 
|

|
Witch Hut: will immediately teach a hero a random Secondary skill if a skill slot is available. | 32 | 1500 | 
|

.gif)

.gif)