Template:Scenario hota: Difference between revisions
Jump to navigation
Jump to search
(Removed redirect to Template:Scenario) Tags: Removed redirect Manual revert |
No edit summary |
||
| Line 1: | Line 1: | ||
<includeonly> | <includeonly>{{#ifexist:File:{{{scenario}}} map large.{{{image_type|png}}}|{{switch|switch1=[[File:{{{scenario}}} map large.{{{image_type|png}}}|170px|border|left]]|switch2=[[File:{{{scenario}}} map large.{{{image_type|png}}}|border|left]]}}|}} | ||
{{#ifexist: File:{{{scenario}}} map | {{{no_underground|{{#ifexist:File:{{{scenario}}} underground map large.{{{u_image_type|png}}}|{{switch|tag1=1|tag2=2|switch1=[[File:{{{scenario}}} underground map large.{{{u_image_type|png}}}|170px|border]]|switch2=[[File:{{{scenario}}} underground map large.{{{u_image_type|png}}}|border]]}}|}}}}} | ||
{{{no_underground|{{#ifexist: File:{{{scenario}}} underground map | |||
{{clear|both}} | {{clear|both}} | ||
{{scenarioInfo | |||
|scenario={{{scenario}}} | |||
|size={{{size|unknown}}} | |||
|no_underground={{{if#:{{{no_underground}}}|disabled|enabled}}} | |||
|description={{{description|}}} | |||
|victory={{{victory|}}} | |||
|loss={{{loss|}}} | |||
|allies={{{allies|}}} | |||
|enemies={{{enemies|}}} | |||
|difficulty={{{difficulty|unknown}}} | |||
}}{{clear|both}} | |||
== See also == | == See also == | ||
* [[List of maps]] | * [[List of maps]] | ||
* [[List of maps (HotA)]] | * [[List of maps (HotA)]] | ||
[[Category:Single and Multiplayer Scenarios (HotA)]]</includeonly><noinclude> | |||
==Variables== | |||
NOTE: Defaults are in '''bold'''. No bold means the default is blank. | |||
{| class="wikitable" | |||
|- style="font-weight:bold;" | |||
! scenario | |||
! size | |||
! image_type | |||
! u_image_type | |||
! no_underground | |||
! description | |||
! victory | |||
! loss | |||
! allies | |||
! enemies | |||
! difficulty | |||
|- | |||
| Scenario<br>name | |||
| Map<br>size | |||
| colspan=2 |Image type for overworld/<br>underground pic | |||
| If present,<br>no underground<br>on map | |||
| Scenario<br>description | |||
| Victory conditions | |||
| Loss conditions | |||
| colspan=2 | List of colors:<br>allied (min: 1)<br>enemy (min: 0) | |||
| Default difficulty | |||
== | |- | ||
| | |||
| {{S map size icon}} S<br>{{M map size icon}} M<br>{{L map size icon}} L<br>{{XL map size icon}} XL<br>{{H map size icon}} H<br>{{XH map size icon}} XH<br>{{G map size icon}} G | |||
| colspan=2 style="text-align:center;"|'''png'''<br>jpg<br>gif<br>etc. | |||
| {{Underground map icon disabled}} (disabled)<br>{{Underground map icon enabled}} '''(enabled)''' | |||
| | |||
| [[File:Accumulate Creatures.png]] Accumulate Creatures<br>[[File:Accumulate Resources.png]] Accumulate Resources<br>[[File:Acquire Artifact.png]] Acquire Artifact<br>[[File:Build a Grail Structure.png]] Build a Grail Structure<br>[[File:Capture Town.png]] Capture Town<br>[[File:Defeat All Enemies.png]] Defeat All Enemies<br>[[File:Defeat All Monsters.png]] Defeat All Monsters<br>[[File:Defeat Hero.png]] Defeat Hero<br>[[File:Defeat Monster.png]] Defeat Monster<br>[[File:Flag All Creature Dwellings.png]] Flag All Creature Dwellings<br>[[File:Flag All Mines.png]] Flag All Mines<br>[[File:Survive Until Time Expires.png]] Survive Until Time Expires<br>[[File:Transport Artifact.png]] Transport Artifact<br>[[File:Upgrade Town.png]] Upgrade Town | |||
| <span style="white-space:nowrap;">[[File:Lose All Your Towns and Heroes.png]] Lose All Your Towns and Heroes</span><br>[[File:Lose Hero.png]] Lose Hero<br>[[File:Lose Town.png]] Lose Town<br>[[File:Time Expires.png]] Time Expires | |||
| colspan=2 |{{red}} {{tl|red}}<br>{{blue}} {{tl|blue}}<br>{{tan}} {{tl|tan}}<br>{{green}} {{tl|green}}<br>{{orange}} {{tl|orange}}<br>{{purple}} {{tl|purple}}<br>{{teal}} {{tl|teal}}<br>{{pink}} {{tl|pink}} | |||
| {{Easy difficulty}} Easy<br>{{Normal difficulty}} Normal<br>{{Hard difficulty}} Hard<br>{{Expert difficulty}} Expert<br>{{Impossible difficulty}} Impossible | |||
|} | |||
| | |||
==Example== | |||
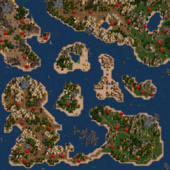
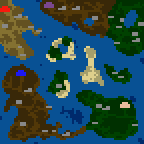
{{scenario | |||
| scenario = Emerald Isles | |||
| description = The Emerald Isles lie along a major shipping route, which several Barons each seek to control for themselves. You have been chosen to 'persuade' the others to give up their claims. | |||
| no_underground = | |||
}} | |||
[[Category: | Use <span class=plainlinks>[https://tinypng.com TinyPNG.com]</span> to compress the map images before uploading (also compresses JPG). | ||
__NOTOC__ | |||
[[Category:Map templates]]</noinclude> | |||
Revision as of 21:36, 12 December 2023
Variables
NOTE: Defaults are in bold. No bold means the default is blank.
| scenario | size | image_type | u_image_type | no_underground | description | victory | loss | allies | enemies | difficulty |
|---|---|---|---|---|---|---|---|---|---|---|
| Scenario name |
Map size |
Image type for overworld/ underground pic |
If present, no underground on map |
Scenario description |
Victory conditions | Loss conditions | List of colors: allied (min: 1) enemy (min: 0) |
Default difficulty | ||
| png jpg gif etc. |
||||||||||
Example

|

|
Use TinyPNG.com to compress the map images before uploading (also compresses JPG).