User:ShushMaster/shushmaster conservatory: Difference between revisions
Jump to navigation
Jump to search
ShushMaster (talk | contribs) No edit summary |
No edit summary |
||
| (6 intermediate revisions by 2 users not shown) | |||
| Line 1: | Line 1: | ||
{| | <noinclude>__TOC__ | ||
==Halls== | |||
https://heroes.thelazy.net/index.php?title=Template:Halls&oldid=23051 | |||
{| border=0 cellpadding=0 cellspacing=0 valign=middle style="background-color:#{{purple 3}}; border: 1px solid; float:{{{float|right}}};" | |||
|- style="height: 25px;" | |||
| align=center bgcolor={{purple 1}} style="color:#FFFFFF" | '''Halls''' | |||
|- | |||
| align=center bgcolor={{purple 2}} | '''Pictures:''' | |||
|- | |||
| [[File: Castle Village Hall.gif|Village Hall of Castle|link=Castle town]][[File: Tower Village Hall.gif|Village Hall of Tower|link=Tower town]][[File: Rampart Village Hall.gif|Village Hall of Rampart|link=Rampart town]][[File: Inferno Village Hall.gif|Village Hall of Inferno|link=Inferno town]][[File: Necropolis Village Hall.gif|Village Hall of Necropolis|link=Necropolis town]][[File: Dungeon Village Hall.gif|Village Hall of Dungeon|link=Dungeon town]][[File: Stronghold Village Hall.gif|Village Hall of Stronghold|link=Stronghold town]][[File: Fortress Village Hall.gif|Village Hall of Fortress|link=Fortress town]][[File: Conflux Village Hall.gif|Village Hall of Conflux|link=Conflux town]] | |||
|- | |- | ||
| [[File: Castle Town Hall.gif|Town Hall of Castle|link=Castle town]][[File: Tower Town Hall.gif|Town Hall of Tower|link=Tower town]][[File: Rampart Town Hall.gif|Town Hall of Rampart|link=Rampart town]][[File: Inferno Town Hall.gif|Town Hall of Inferno|link=Inferno town]][[File: Necropolis Town Hall.gif|Town Hall of Necropolis|link=Necropolis town]][[File: Dungeon Town Hall.gif|Town Hall of Dungeon|link=Dungeon town]][[File: Stronghold Town Hall.gif|Town Hall of Stronghold|link=Stronghold town]][[File: Fortress Town Hall.gif|Town Hall of Fortress|link=Fortress town]][[File: Conflux Town Hall.gif|Town Hall of Conflux|link=Conflux town]] | |||
|- | |- | ||
| [[File: Castle City Hall.gif|City Hall of Castle|link=Castle town]][[File: Tower City Hall.gif|City Hall of Tower|link=Tower town]][[File: Rampart City Hall.gif|City Hall of Rampart|link=Rampart town]][[File: Inferno City Hall.gif|City Hall of Inferno|link=Inferno town]][[File: Necropolis City Hall.gif|City Hall of Necropolis|link=Necropolis town]][[File: Dungeon City Hall.gif|City Hall of Dungeon|link=Dungeon town]][[File: Stronghold City Hall.gif|City Hall of Stronghold|link=Stronghold town]][[File: Fortress City Hall.gif|City Hall of Fortress|link=Fortress town]][[File: Conflux City Hall.gif|City Hall of Conflux|link=Conflux town]] | |||
| | |- | ||
| | {{{no_pre| | ||
{{!}} align=center bgcolor={{purple 2}}{{!}} '''Prerequisite:''' }}} | |||
|- | |||
| colspan=8 style="width: 150px;" | | |||
{| cellpadding=0 cellspacing=0 valign=middle style="background-color:#{{purple 3}};" | |||
| style="border-left: 5px solid #E8C0E8; border-right: 5px solid #{{purple 3}};" | {{{pre|}}} | |||
| | |||
|} | |} | ||
|- | |||
{{{no_cost| | |||
{{!}} colspan=8 align=center bgcolor={{purple 2}}{{!}} '''Cost:''' | |||
{{!-}} align=center valign=middle | |||
{{!}} {{{wood|}}} {{{mercury|}}} {{{ore|}}} {{{sulfur|}}} {{{crystal|}}} {{{gem|}}} {{{gold|}}} }}} | |||
|- | |||
| colspan=8 align=center bgcolor={{purple 2}} style="width: 150px;" | '''Effect:''' | |||
|- | |||
| colspan=8 style="width: 150px;" | | |||
{| cellpadding=0 cellspacing=0 valign=middle style="background-color:#{{purple 3}};" | |||
| style="border-left: 5px solid #{{purple 3}}; border-right: 5px solid #E5CCFF; font-size:90%;" | {{{effect|}}} | |||
|} | |||
|} | |||
<div style="clear:both;"></div> | |||
< | ==Common buildings== | ||
</noinclude><includeonly>{| align="left" border=0 cellspacing=0 cellpadding=0 style="background-color:#{{Purple 3}}; text-align:center; border: 0.1em solid black; margin-bottom:1em;" | |||
|- style="color:white; background:#{{Purple 1}}; padding-left: 1em; height:25px" | |||
| '''Halls''' | |||
| style="padding:0em 0.5em 0em 0.5em;" | | |||
| '''Fortifications''' | |||
| style="padding:0em 0.5em 0em 0.5em;" | | |||
| '''Tavern, Marketplace</br>& Resource Silo''' | |||
| style="padding:0em 0.5em 0em 0.5em;" | | |||
| '''Mage Guilds''' | |||
|- | |||
| [[Image: {{{1|}}} Village Hall large.gif|Village Hall|link=Halls]]</br>[[Village Hall]] | |||
| | |||
| [[Image: {{{1|}}} Fort large.gif|Fort|link=Fortifications]]</br>[[Fort]] | |||
| | |||
| [[Image: {{{1|}}} Tavern large.gif|Tavern|link=Tavern]]</br>[[Tavern]] | |||
| | |||
| [[Image: {{{1|}}} Mage Guild level 1 large.gif|Mage Guild level 1|link=Mage Guild]]</br>[[Mage Guild|Mage Guild level 1]] | |||
|- | |||
| [[Image: {{{1|}}} Town Hall large.gif|link=Halls]]</br>[[Halls|Town Hall]] | |||
| | |||
| [[Image: {{{1|}}} Citadel large.gif|Citadel|link=Fortifications]]</br>[[Citadel]] | |||
| | |||
| [[Image: {{{1|}}} Marketplace large.gif|Marketplace|link=Marketplace]]</br>[[Marketplace]] | |||
| | |||
| [[Image: {{{1|}}} Mage Guild level 2 large.gif|Mage Guild level 2|link=Mage Guild]]</br>[[Mage Guild|Mage Guild level 2]] | |||
|- | |||
| [[Image: {{{1|}}} City Hall large.gif|City Hall|link=Halls]]</br>[[City Hall]] | |||
| | |||
| [[Image: {{{1|}}} Castle large.gif|Castle|link=Fortifications]]</br>[[Fortifications|Castle]] | |||
| | |||
| [[Image: {{{1|}}} Resource Silo large.gif|Resource Silo|link=Resource Silo]]</br>[[Resource Silo]] ({{{3|}}}) | |||
| | |||
| [[Image: {{{1|}}} Mage Guild level 3 large.gif|Mage Guild level 3|link=Mage Guild]]</br>[[Mage Guild|Mage Guild level 3]] | |||
|- | |||
| style="vertical-align:top;" | [[Image: {{{1|}}} Capitol large.gif|Capitol|link=Halls]]</br>[[Capitol]] | |||
| | |||
| [[Image: {{{1|}}} Blacksmith large.gif|Blacksmith|link=Blacksmith]]</br>[[Blacksmith]] | |||
| | |||
| | |||
| | |||
| {{{no_4|[[Image: {{{1|}}} Mage Guild level 4 large.gif|Mage Guild level 4|link=Mage Guild]]}}}{{{no_4|</br>}}}{{{no_4|[[Mage Guild|Mage Guild level 4]]}}} | |||
|- | |||
| | |||
| | |||
| style="vertical-align:top;" | [[Image: {{{2|}}}.png|x56px|link={{{2}}}]] | |||
| | |||
| | |||
| | |||
| {{{no_5|[[Image: {{{1|}}} Mage Guild level 5 large.gif|Mage Guild level 5|link=Mage Guild]]}}}{{{no_5|</br>}}}{{{no_5|[[Mage Guild|Mage Guild level 5]]}}} | |||
|}</includeonly><noinclude> | |||
{{:User:ShushMaster/shushmaster conservatory|Inferno|Ammo cart|+1 {{M}}}} | |||
{| frame cellspacing=0 cellpadding=0 style="float:right; margin: 0 0 1em 1em; background-color:#{{Purple 3}}; width: 396px; border: 1px solid grey" | {| frame cellspacing=0 cellpadding=0 style="float:right; margin: 0 0 1em 1em; background-color:#{{Purple 3}}; width: 396px; border: 1px solid grey" | ||
| Line 310: | Line 156: | ||
|} | |} | ||
{| border cellspacing=0 cellpadding=5 style="float:right; margin: 0 0 1em 1em; background-color:#{{Purple 3}}; width: | {| border cellspacing=0 cellpadding=5 style="float:right; margin: 0 0 1em 1em; background-color:#{{Purple 3}}; width: 426px; border: 1px solid grey" | ||
|- bgcolor={{Purple 1}} | |- bgcolor={{Purple 1}} | ||
! colspan=9 style="color:white" | Mage Guilds | ! colspan=9 style="color:white" | Mage Guilds | ||
|- bgcolor=mediumorchid style="text-align:left;" | |- bgcolor=mediumorchid style="text-align:left;" | ||
! text-align:left;" align=center |Structure | ! text-align:left;" align=center |Structure | ||
! text-align:left;" width= | ! text-align:left;" width=146px align=center |Cost | ||
! text-align:left;" width=70px|Requirements | ! text-align:left;" width=70px|Requirements | ||
|- | |- | ||
| Line 347: | Line 193: | ||
|- | |- | ||
| colspan=3 |<small>'''Benefits:''' One level 5 spell becomes available for heroes to learn. | | colspan=3 |<small>'''Benefits:''' One level 5 spell becomes available for heroes to learn. | ||
|} | |}</noinclude> | ||
</noinclude> | |||
Latest revision as of 13:42, 26 April 2021
Halls[edit]
https://heroes.thelazy.net/index.php?title=Template:Halls&oldid=23051
| Halls | ||||||||
| Pictures: | ||||||||
        
| ||||||||
        
| ||||||||
        
| ||||||||
| Prerequisite: | ||||||||
|
| ||||||||
| Cost: | ||||||||
| Effect: | ||||||||
|
| ||||||||
Common buildings[edit]
| Halls | Fortifications | Tavern, Marketplace & Resource Silo |
Mage Guilds | |||
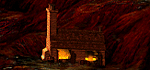
 Village Hall |
 Fort |
 Tavern |
 Mage Guild level 1 | |||
 Town Hall |
 Citadel |
 Marketplace |
 Mage Guild level 2 | |||
 City Hall |
 Castle |
 Resource Silo (+1 |
 Mage Guild level 3 | |||
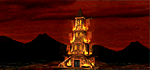
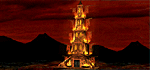
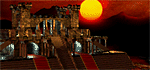 Capitol |
 Blacksmith |
 Mage Guild level 4 | ||||
 Mage Guild level 5 |
| Halls | ||||||||
|---|---|---|---|---|---|---|---|---|
 Village Hall |
Cost: | Requirements: | ||||||
|
• N/A | |||||||
| Benefits: Automatically part of all towns; provides an income of 500 | ||||||||
 Town Hall |
Cost: | Requirements: | ||||||
|
• Village Hall • Tavern | |||||||
| Benefits: Provides 1000 | ||||||||
 City Hall |
Cost: | Requirements: | ||||||
|
• Town Hall • Blacksmith • Mage Guild • Marketplace | |||||||
| Benefits: Provides 2000 | ||||||||
 Capitol |
Cost: | Requirements: | ||||||
|
• City Hall • Castle | |||||||
| Benefits: Provides 4000 | ||||||||
| Fortifications | |||||||||
|---|---|---|---|---|---|---|---|---|---|
| Structure | Cost | Requirements | |||||||
 Fort |
|
• Village Hall | |||||||
| Benefits: Adds walls to a town | |||||||||
 Citadel |
|
• Fort | |||||||
| Benefits: Adds moat and primary arrow tower to a town. Increases production of creature dwellings by 50%. | |||||||||
 Castle |
|
• Citadel | |||||||
| Benefits: Adds two secondary arrow towers, standard walls are strengthened to fortified walls. Increases production of creature dwellings by 100%. | |||||||||
| Mage Guilds | |||||||||
|---|---|---|---|---|---|---|---|---|---|
| Structure | Cost | Requirements | |||||||
 Mage Guild Level 1 |
|
• Village Hall | |||||||
| Benefits: Five level 1 spells become available for heroes to learn. Heroes are able to purchase a spell book for 500 | |||||||||
 Mage Guild Level 2 Mage Guild Level 2
|
|
• Mage Guild Level 1 | |||||||
| Benefits: Four level 2 spells become available for heroes to learn. | |||||||||
 Mage Guild Level 3 Mage Guild Level 3
|
|
• Mage Guild Level 2 | |||||||
| Benefits: Three level 3 spells become available for heroes to learn. | |||||||||
 Mage Guild Level 4 Mage Guild Level 4
|
|
• Mage Guild Level 3 | |||||||
| Benefits: Two level 4 spells become available for heroes to learn. | |||||||||
| Mage Guild Level 5 |
|
• Mage Guild Level 4 | |||||||
| Benefits: One level 5 spell becomes available for heroes to learn. | |||||||||