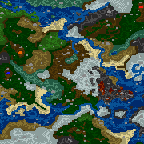
Daggerwin Valley: Difference between revisions
Jump to navigation
Jump to search
No edit summary |
No edit summary |
||
| (2 intermediate revisions by 2 users not shown) | |||
| Line 1: | Line 1: | ||
{{ | {{SingleScenario | ||
|scenario= | | scenario = Daggerwin Valley | ||
|description=The Daggerwin River valley has since forever been known for its ample wealth. Its corridor is the only trade route to the old continent; taking over it will allow you to bolster your power. | | description = The Daggerwin River valley has since forever been known for its ample wealth. Its corridor is the only trade route to the old continent; taking over it will allow you to bolster your power. | ||
| num_play = 4/4 | | num_play = 4/4 | ||
| size = H | | size = H | ||
| source = hota | | source = hota | ||
| victory = def_all | | victory = Defeat All Enemies. | ||
| loss = all | | victory_c = def_all | ||
| allies = {{red}} | | loss = Lose All Your Towns and Heroes. | ||
| enemies = {{blue}}{{green}}{{orange}} | | loss_c = all | ||
| allies = {{red}}/ {{blue}}/ {{green}}/ {{orange}} | |||
| enemies = {{red}}/ {{blue}}/ {{green}}/ {{orange}} | |||
| smap = hota rampart | |||
}} | }} | ||
{{Maps 'see also'}} | |||
Latest revision as of 16:37, 4 April 2025

Daggerwin Valley
Scenario Description
The Daggerwin River valley has since forever been known for its ample wealth. Its corridor is the only trade route to the old continent; taking over it will allow you to bolster your power.
Victory Condition
Defeat All Enemies.
Loss Condition
Lose All Your Towns and Heroes.
Allies:  /
/  /
/  /
/ 
Enemies:  /
/  /
/  /
/ 


