Template:Unavailable spells by town/restricted: Difference between revisions
Jump to navigation
Jump to search
No edit summary |
No edit summary |
||
| (3 intermediate revisions by 2 users not shown) | |||
| Line 8: | Line 8: | ||
|- | |- | ||
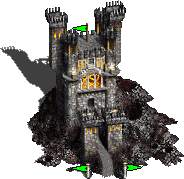
| style="text-align:center; background-color:#{{Teal 3}};" | {{swh|[[File:Adventure Map Castle capitol (HotA). | | style="text-align:center; background-color:#{{Teal 3}};" | {{swh|noicon=|[[File: Adventure Map Castle capitol (HotA).webp]]|[[File: Adventure Map Castle capitol.webp]]}}<p>[[Castle]] | ||
| | | | ||
| {{Sn|Animate Dead}}<br>{{Sn|Death Ripple}} | | {{Sn|Animate Dead}}<br>{{Sn|Death Ripple}} | ||
| Line 15: | Line 15: | ||
|- | |- | ||
| style="text-align:center; background-color:#{{Teal 3}};" | {{swh|[[File:Adventure Map Rampart capitol (HotA). | | style="text-align:center; background-color:#{{Teal 3}};" | {{swh|noicon=|[[File: Adventure Map Rampart capitol (HotA).webp]]|[[File: Adventure Map Rampart capitol.webp]]}}<p>[[Rampart]] | ||
| {{Sn|Summon Air Elemental}} | | {{Sn|Summon Air Elemental}} | ||
| {{Sn|Animate Dead}}<br>{{Sn|Death Ripple}} | | {{Sn|Animate Dead}}<br>{{Sn|Death Ripple}} | ||
| Line 22: | Line 22: | ||
|- | |- | ||
| style="text-align:center; background-color:#{{Teal 3}};" | {{swh|[[File:Adventure Map Tower capitol (HotA). | | style="text-align:center; background-color:#{{Teal 3}};" | {{swh|noicon=|[[File: Adventure Map Tower capitol (HotA).webp]]|[[File: Adventure Map Tower capitol.webp]]}}<p>[[Tower]] | ||
| | | | ||
| {{Sn|Animate Dead}}<br>{{Sn|Death Ripple}} | | {{Sn|Animate Dead}}<br>{{Sn|Death Ripple}} | ||
| Line 29: | Line 29: | ||
|- | |- | ||
| style="text-align:center; background-color:#{{Teal 3}};" | {{swh| | | style="text-align:center; background-color:#{{Teal 3}};" | {{swh|noicon=|{{watchable|Adventure Map Inferno capitol (HotA).webp}}|{{watchable|Adventure Map Inferno capitol.webp}}}}<p>[[Inferno]] | ||
| {{Sn|Magic Mirror}}<br>{{Sn|Summon Air Elemental}} | | {{Sn|Magic Mirror}}<br>{{Sn|Summon Air Elemental}} | ||
| {{Sn|Animate Dead}}<br>{{Sn|Death Ripple}} | | {{Sn|Animate Dead}}<br>{{Sn|Death Ripple}} | ||
| Line 36: | Line 36: | ||
|- | |- | ||
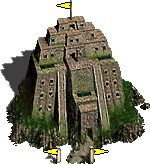
| style="text-align:center; background-color:#{{Teal 3}};" | {{swh|[[File:Adventure Map Necropolis capitol (HotA). | | style="text-align:center; background-color:#{{Teal 3}};" | {{swh|noicon=|[[File: Adventure Map Necropolis capitol (HotA).webp]]|[[File: Adventure Map Necropolis capitol.webp]]}}<p>[[Necropolis]] | ||
| {{Sn|Destroy Undead}}<br>{{Sn|Hypnotize}}<br>{{Sn|Magic Mirror}} | | {{Sn|Destroy Undead}}<br>{{Sn|Hypnotize}}<br>{{Sn|Magic Mirror}} | ||
| | | | ||
| Line 43: | Line 43: | ||
|- | |- | ||
| style="text-align:center; background-color:#{{Teal 3}};" | {{swh|[[File:Adventure Map Dungeon capitol (HotA). | | style="text-align:center; background-color:#{{Teal 3}};" | {{swh|noicon=|[[File: Adventure Map Dungeon capitol (HotA).webp]]|[[File: Adventure Map Dungeon capitol.webp]]}}<p>[[Dungeon]] | ||
| {{Sn|Summon Air Elemental}} | | {{Sn|Summon Air Elemental}} | ||
| {{Sn|Animate Dead}}<br>{{Sn|Death Ripple}} | | {{Sn|Animate Dead}}<br>{{Sn|Death Ripple}} | ||
| Line 50: | Line 50: | ||
|- | |- | ||
| style="text-align:center; background-color:#{{Teal 3}};" | {{swh|[[File:Adventure Map Stronghold capitol (HotA). | | style="text-align:center; background-color:#{{Teal 3}};" | {{swh|noicon=|[[File: Adventure Map Stronghold capitol (HotA).webp]]|[[File: Adventure Map Stronghold capitol.webp]]}}<p>[[Stronghold]] | ||
| | | | ||
| {{Sn|Animate Dead}}<br>{{Sn|Death Ripple}} | | {{Sn|Animate Dead}}<br>{{Sn|Death Ripple}} | ||
| Line 57: | Line 57: | ||
|- | |- | ||
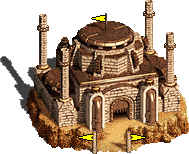
| style="text-align:center; background-color:#{{Teal 3}};" | {{swh| | | style="text-align:center; background-color:#{{Teal 3}};" | {{swh|noicon=|{{watchable|Adventure Map Fortress capitol (HotA).webp}}|{{watchable|Adventure Map Fortress capitol.webp}}}}<p>[[Fortress]] | ||
| {{Sn|Disguise}}<br> | | {{Sn|Disguise}}<br> | ||
| {{Sn|Animate Dead}}<br>{{Sn|Death Ripple}}<br>{{Sn|Protection from Earth}} | | {{Sn|Animate Dead}}<br>{{Sn|Death Ripple}}<br>{{Sn|Protection from Earth}} | ||
| Line 64: | Line 64: | ||
|- | |- | ||
| style="text-align:center; background-color:#{{Teal 3}};" | {{swh|[[File:Adventure Map Conflux capitol (HotA). | | style="text-align:center; background-color:#{{Teal 3}};" | {{swh|noicon=|[[File: Adventure Map Conflux capitol (HotA).webp]]|[[File: Adventure Map Conflux capitol.webp]]}}<p>[[Conflux]] | ||
| | | | ||
| {{Sn|Animate Dead}}<br>{{Sn|Death Ripple}} | | {{Sn|Animate Dead}}<br>{{Sn|Death Ripple}} | ||
| Line 71: | Line 71: | ||
|- class='onlyhota' | |- class='onlyhota' | ||
| style="text-align:center; background-color:#{{Teal 3}};" | | | style="text-align:center; background-color:#{{Teal 3}};" | [[File:Adventure Map Cove capitol.webp|Cove|link=Cove]]<p>[[Cove]]{{-wh}} | ||
| | | | ||
| {{Sn|Animate Dead}}<br>{{Sn|Death Ripple}} | | {{Sn|Animate Dead}}<br>{{Sn|Death Ripple}} | ||
| Line 78: | Line 78: | ||
|- class='onlyhota' | |- class='onlyhota' | ||
| style="text-align:center; background-color:#{{Teal 3}};" | | | style="text-align:center; background-color:#{{Teal 3}};" | {{watchable|Adventure Map Factory capitol.webp}}<p>[[Factory]]{{-wh}} | ||
| | | | ||
| {{Sn|Animate Dead}}<br>{{Sn|Death Ripple}} | | {{Sn|Animate Dead}}<br>{{Sn|Death Ripple}} | ||
| {{Sn|Armageddon}}<br>{{Sn|Curse}}<br>{{Sn|Sacrifice}}<br>{{Sn|Summon Fire Elemental}} | | {{Sn|Armageddon}}<br>{{Sn|Curse}}<br>{{Sn|Sacrifice}}<br>{{Sn|Summon Fire Elemental}} | ||
| {{Sn|Summon Water Elemental}} | | {{Sn|Summon Water Elemental}} | ||
|- class='onlyhota' | |||
| style="text-align:center; background-color:#{{Teal 3}};" | [[File:Adventure Map Bulwark capitol.webp|Bulwark|link=Bulwark]]<p>[[Bulwark]]{{-wh}} | |||
| | |||
| {{Sn|Animate Dead}}<br>{{Sn|Death Ripple}} | |||
| {{Sn|Armageddon}}<br>{{Sn|Curse}} | |||
| | |||
|}<noinclude> | |}<noinclude> | ||
Latest revision as of 01:33, 3 January 2026
.webp)

.webp)

.webp)

.webp)

.webp)

.webp)

.webp)


