Horn of the Abyss: Difference between revisions
Olegmods.INC (talk | contribs) mNo edit summary |
No edit summary |
||
| Line 20: | Line 20: | ||
[[Under the Jolly Roger]], [[Terror of the Seas]], and [[Horn of the Abyss (campaign)|Horn of the Abyss]] tell the story of [[Jeremy]] and [[Bidley]] in their quest for the [[Horn of the Abyss (artifact)|Horn of the Abyss]]. | [[Under the Jolly Roger]], [[Terror of the Seas]], and [[Horn of the Abyss (campaign)|Horn of the Abyss]] tell the story of [[Jeremy]] and [[Bidley]] in their quest for the [[Horn of the Abyss (artifact)|Horn of the Abyss]]. | ||
[[Jeremy]] and his | [[Jeremy]] and his [[pirate]] crew crash their ship on an unnamed island in the [[Nighon Straits]]. Making the best of a bad situation, they capture an old [[Erathia|Erathian]] fort and rename it [[Utopia]]. They are contacted by a native chief, [[Alkin]], who alerts them that the [[Kreegan|Kreegans]] are about to invade this little island. Working together, [[Jeremy]] and [[Alkin]] managed to repulse the [[Kreegan|Kreegans]]. [[Jeremy]] leaves [[Utopia]] under [[Alkin]]'s control and sails away in a stolen [[Kreegan]] vessel. When he reaches [[Evenmorn Island]], he comes to the aid of [[Casmetra]] and the [[Priestesses of the Sea]] who had come under attack from the [[Temple of the Moon]]. | ||
Meanwhile, [[Bidley]] is off on his own adventure, rescuing [[Xanthor]] from a magical prison in [[Krewlod]]. In return, [[Xanthor]] tells him of the location of the fabled [[Horn of the Abyss (artifact)|Horn of the Abyss]]. [[Bidley]] then meets up with [[Jeremy]] and [[Casmetra]] and all three decide to go on a quest to obtain the Horn. They raid [[Kreegan]]-controlled [[Fire Coast]] to fund their quest and in the process rescue [[Tark]], the prince of the | Meanwhile, [[Bidley]] is off on his own adventure, rescuing [[Xanthor]] from a magical prison in [[Krewlod]]. In return, [[Xanthor]] tells him of the location of the fabled [[Horn of the Abyss (artifact)|Horn of the Abyss]]. [[Bidley]] then meets up with [[Jeremy]] and [[Casmetra]] and all three decide to go on a quest to obtain the Horn. They raid [[Kreegan]]-controlled [[Fire Coast]] to fund their quest and in the process rescue [[Tark]], the prince of the [[Nix]]. [[Tark]] swims off to free his people from slavery in [[Nighon]], but not before vowing to return. [[Jeremy]], [[Bidley]], and [[Casmetra]] continue on the the [[Island of the Vengeful Serpent]], the resting place of the [[Horn of the Abyss (artifact)|Horn of the Abyss]]. | ||
Along the way, they are attacked by the [[Tatalia|Tatalian]] navy and barely escape. Upon reaching the island (which turns out to be an [[Ancient]] armory), the accidently activate the security system. [[Bidley]] is trapped inside and continues to seek the Horn, while [[Jeremy]] and [[Casmetra]] are left to fight off the pursuing [[Tatalia|Tatalians]]. [[Bidley]] finds and frees [[Dargem]], a mage who had been trapped while seeking the Horn. Together they manage to find the Horn, but at the last second, [[Dargem]] attacks [[Bidley]], knocking him unconscious and taking the Horn for himself. Not knowing how to use it, though, he takes [[Bidley]] captive sails off. | Along the way, they are attacked by the [[Tatalia|Tatalian]] navy and barely escape. Upon reaching the island (which turns out to be an [[Ancient]] armory), the accidently activate the security system. [[Bidley]] is trapped inside and continues to seek the Horn, while [[Jeremy]] and [[Casmetra]] are left to fight off the pursuing [[Tatalia|Tatalians]]. [[Bidley]] finds and frees [[Dargem]], a mage who had been trapped while seeking the Horn. Together they manage to find the Horn, but at the last second, [[Dargem]] attacks [[Bidley]], knocking him unconscious and taking the Horn for himself. Not knowing how to use it, though, he takes [[Bidley]] captive sails off. | ||
| Line 33: | Line 33: | ||
=== [[Forged in Fire]] === | === [[Forged in Fire]] === | ||
This campaign occurs mostly before the story of [[Jeremy]] and [[Bidley]]. It follows the story of the | This campaign occurs mostly before the story of [[Jeremy]] and [[Bidley]]. It follows the story of the [[Halflings]] from their flight from the [[Kreegan|Kreegans]] during the [[Night of Shooting Stars]] to the eventual liberation of their homeland ([[Eeofol]]) during the [[War of the Blade]]. | ||
During the [[Night of Shooting Stars]], the [[Kreegan|Kreegans]] invade and occupy the | During the [[Night of Shooting Stars]], the [[Kreegan|Kreegans]] invade and occupy the [[Halfling]] homeland of [[Eeofol]]. [[Henrietta]] and her mentor [[Frederick]] (a rogue [[Bracada|Bracadan]] mage and inventor), barely manage to rally the [[Halflings]] and escape on [[Frederick]]'s skyships. They sail to [[Jadame]] to meet [[Frederick]]'s colleague [[Sam]] at her home of [[Burton]]. [[Burton]], however, has troubles of its own, being beset by [[Zog]]'s ogres. The [[Halfling|Halflings]] settle in [[Burton]] and together they defeat [[Zog]] and turn their attention to another threa, [[Dargem]]'s pirates. Looking for allies against this new threat, [[Henrietta]] enlists [[Boyd]], a sentient skeleton and former member of [[Dargem]]'s crew. [[Dargem]] had betrayed and murdered [[Boyd]] and now [[Boyd]] only exists to enact his vengeance on [[Dargem]]. After a tough battle, [[Henrietta]] and [[Boyd]] are victorious and, as agreed, [[Henrietta]] leaves [[Dargem]] at [[Boyd]]'s mercy. | ||
The immediate crises solved, the | The immediate crises solved, the [[Halfling|Halflings]] work hard to improve [[Burton]]. With their help, it becomes a thriving city-state. Several years later, a series of unnatural earthquakes shake the region and [[Henrietta]], now the Scout-Master of [[Burton]], sets off to investigate. When he hears no word from her in several months, [[Frederick]] sets off to find his friend. Unexpectedly, he is joined by [[Kastore]] (the king of [[Deyja]]), who is in [[Jadame]] on his own secret purposes. As fate would have it, the "tombs" north of [[Burton]] where [[Henrietta]] went missing are actually a crashed [[Ancient]] starship. As [[Kastore]] is looking for a way to restart a [[Heavenly Forge]], he is very interested in this development. While exploring the ship, he educates [[Frederick]] on the wider universe, eventually accepting him as his apprentice. After weeks or months of searching, [[Kastore]] and [[Frederick]] solve the mystery of the earthquakes. The [[Warlock]] [[Agar]] has been modifying the local [[Sandworm|Sandworms]] into the mighty [[Olgoi-Khorkhoi]]! When he eventually creates the [[Matriarch]] (an Olgoi-Khorkhoi Queen), she wrests control of the worms away from [[Agar]]. Now she and her brood rampage through the mountains, destabilizing the whole region. [[Frederick]], [[Kastore]], and [[Agar]], now set off to find and destroy the [[Matriarch]] and after more searching find [[Henrietta]] fending her off using a salvaged [[Ancient]] power core. Together, they defeat the [[Matriarch]] and return to [[Burton]], where [[Kastore]] quietly confiscates the [[Ancient]] technology and encourages [[Burton]] into a technological revolution. This revolution leads to the improvement of [[Frederick]]'s [[Automaton|Automatons]] and the creation of the fearsome [[Dreadnought|Dreadnoughts]]. | ||
[[Burton]] is thriving and [[Kastore]] insidious schemes have not yet come to light. [[Henrietta]] sets out to explore the nearby [[Couatl Islands]] with a new friend [[Wynona]]. With the help of [[Tlamac Hundred Thoughts]], they save the | [[Burton]] is thriving and [[Kastore]] insidious schemes have not yet come to light. [[Henrietta]] sets out to explore the nearby [[Couatl Islands]] with a new friend [[Wynona]]. With the help of [[Tlamac Hundred Thoughts]], they save the [[Couatl|Couatls]] from extinction and defeat [[Pactal]] and the evil [[Nightcrawlers]] before returning to [[Burton]] (now formally the nation of [[Terra Nova]]). In her time away, however, [[Kastore]] has seized control of [[Terra Nova]], turning it into a dystopian nightmare and declaring the [[Halfling|Halflings]] enemies of the state. Once again the [[Halfling|Halflings]] are forced to flee their home, however this time they commandeer enough forces to attempt to liberate their original homeland, [[Eeofol]]. | ||
Their timing for arriving back in [[Eeofol]] was fortuitous, coinciding with the last stages of the [[War of the Blade]]. While [[Catherine]], [[Roland]], and [[Gelu]] attacked [[Eeofol]] from the west, the | Their timing for arriving back in [[Eeofol]] was fortuitous, coinciding with the last stages of the [[War of the Blade]]. While [[Catherine]], [[Roland]], and [[Gelu]] attacked [[Eeofol]] from the west, the [[Halfling|Halflings]] attacked from the east. Ultimately, the [[Kreegan|Kreegans]] were utterly defeated and eradicated from [[Enroth (planet)|Enroth]]. | ||
=== [[All In]] === | === [[All In]] === | ||
This campaign follows the story of [[Dargem]] following his defeat by [[Henrietta]] and [[Boyd]] up to his capture and imprisonment while searching for the [[Horn of the Abyss (artifact)|Horn of the Abyss]]. It serves as an interlude to narratively connect the story of the | This campaign follows the story of [[Dargem]] following his defeat by [[Henrietta]] and [[Boyd]] up to his capture and imprisonment while searching for the [[Horn of the Abyss (artifact)|Horn of the Abyss]]. It serves as an interlude to narratively connect the story of the [[Halflings]] to the story of [[Jeremy]] and [[Bidley]]. | ||
== Features == | == Features == | ||
| Line 66: | Line 66: | ||
** {{Cnu|Sea Serpent|Haspid}} | ** {{Cnu|Sea Serpent|Haspid}} | ||
[[pirate|Pirates]] can be upgraded twice, similar to Green Dragons in ''Heroes of Might and Magic II''. | |||
* [[Factory]] | * [[Factory]] | ||
| Line 116: | Line 116: | ||
* [[Conflux]]'s [[native terrain]] changed to [[highlands]]. | * [[Conflux]]'s [[native terrain]] changed to [[highlands]]. | ||
* External [[Creature dwelling|dwellings]] now accumulate creatures cumulatively, as long as they're captured. | * External [[Creature dwelling|dwellings]] now accumulate creatures cumulatively, as long as they're captured. | ||
* | * [[Halfling|Halflings]] changed from [[neutral]] to Factory. | ||
* Various changes to town balance. | * Various changes to town balance. | ||
* [[Spell research]] system. | * [[Spell research]] system. | ||
* New Conflux building: [[Vault of Ashes]]. | * New Conflux building: [[Vault of Ashes]]. | ||
* New [[war machine]]: | * New [[war machine]]: [[Cannon]]. | ||
* New adventure map vehicle: [[Airship]]. | * New adventure map vehicle: [[Airship]]. | ||
* New [[Keybinds]]. | * New [[Keybinds]]. | ||
| Line 209: | Line 209: | ||
[[Category:Expansions]][[Category:Horn of the Abyss|*]] | [[Category:Expansions]][[Category:Horn of the Abyss|*]] | ||
Revision as of 05:11, 26 August 2025

Horn of the Abyss is an unofficial expansion on the same level as Armageddon's Blade and The Shadow of Death.
Horn of the Abyss (or HotA) is a comprehensive expansion for Heroes of Might and Magic III, designed as a continuation of the classic AB/SoD expansions.
The project adds plenty of new features, but stays true to the formula and vision of the original game. Quality is of utmost importance in this addition to the game. This includes the careful balance changes and fixes, removal of the graphical imperfections left by the developers, and the addition of considerable amount of new content, such as new campaigns, playable factions, and map objects. The project is lore-oriented and attempts to keep connected with the original Might and Magic universe.
In 2024, the Cove faction from Horn of the Abyss was canonized by being officially adopted as one of the upcoming expansions for Heroes of Might and Magic III: The Board Game, and in 2025 the project was further recognized by GOG.com in its inclusion of Horn of the Abyss on the official Heroes of Might and Magic III page.
Unlike In the Wake of Gods-based mods, Horn of the Abyss' new towns are added to the game without replacing any existing towns. The mod requires Shadow of Death or Heroes of Might and Magic III Complete to run.
The expansion is officially available in two languages: Russian and English. However, unofficial translations are available in Spanish (1.7.3), Polish (1.7.3), Simplified Chinese (1.7.2), French (1.7.1), German (1.7.1) and Ukrainian (1.7.2).
Plot
The 5 Campaigns are mainly split into 2 separate stories with an interlude between.
Cove Campaigns
Under the Jolly Roger, Terror of the Seas, and Horn of the Abyss tell the story of Jeremy and Bidley in their quest for the Horn of the Abyss.
Jeremy and his pirate crew crash their ship on an unnamed island in the Nighon Straits. Making the best of a bad situation, they capture an old Erathian fort and rename it Utopia. They are contacted by a native chief, Alkin, who alerts them that the Kreegans are about to invade this little island. Working together, Jeremy and Alkin managed to repulse the Kreegans. Jeremy leaves Utopia under Alkin's control and sails away in a stolen Kreegan vessel. When he reaches Evenmorn Island, he comes to the aid of Casmetra and the Priestesses of the Sea who had come under attack from the Temple of the Moon.
Meanwhile, Bidley is off on his own adventure, rescuing Xanthor from a magical prison in Krewlod. In return, Xanthor tells him of the location of the fabled Horn of the Abyss. Bidley then meets up with Jeremy and Casmetra and all three decide to go on a quest to obtain the Horn. They raid Kreegan-controlled Fire Coast to fund their quest and in the process rescue Tark, the prince of the Nix. Tark swims off to free his people from slavery in Nighon, but not before vowing to return. Jeremy, Bidley, and Casmetra continue on the the Island of the Vengeful Serpent, the resting place of the Horn of the Abyss.
Along the way, they are attacked by the Tatalian navy and barely escape. Upon reaching the island (which turns out to be an Ancient armory), the accidently activate the security system. Bidley is trapped inside and continues to seek the Horn, while Jeremy and Casmetra are left to fight off the pursuing Tatalians. Bidley finds and frees Dargem, a mage who had been trapped while seeking the Horn. Together they manage to find the Horn, but at the last second, Dargem attacks Bidley, knocking him unconscious and taking the Horn for himself. Not knowing how to use it, though, he takes Bidley captive sails off.
Tark returns after freeing his people, and, together with Jeremy and Casmetra, sails off in pursuit of Dargem. They defeat Dargem's forces and corner him in a tower, where he reveals Casmetra's betrayal - she had secretly hired him to retrieve the Horn for her! In a last-ditch attempt to escape, Dargem blows the Horn while Casmetra throws a spell to attempt to stop him. The resulting magical explosion throws everyone to all corners of the globe (and beyond).
Jeremy awakes in Klondike where he lights the Lodestar to guide him to Bidley. Bidley lands in the Plane of Water and sacks Coralgate fortress to reach the portal back to Enroth. Dargem winds up in Nighon, where he recruits the Warlocks to go after the Horn with him. Casmetra ends up with the Horn and returns to Regna to experiment with it. Tark also stops near Casmetra and spies on her, awaiting the return of Jeremy and Bidley. When they return, the three of them attack Casmetra and successfully wrest the Horn from her, while she escapes into a portal, never to be heard from again.
By this time, news that the Horn has been found has gotten out. Bracadan and Elemental forces under Solmyr and Regnan and Nighonian forces under Dargem all try to wrest the horn from Bidley, but he successfully defends his prize. With the Horn of the Abyss under his control, Bidley is now the de-facto Pirate King of Regna.
Forged in Fire
This campaign occurs mostly before the story of Jeremy and Bidley. It follows the story of the Halflings from their flight from the Kreegans during the Night of Shooting Stars to the eventual liberation of their homeland (Eeofol) during the War of the Blade.
During the Night of Shooting Stars, the Kreegans invade and occupy the Halfling homeland of Eeofol. Henrietta and her mentor Frederick (a rogue Bracadan mage and inventor), barely manage to rally the Halflings and escape on Frederick's skyships. They sail to Jadame to meet Frederick's colleague Sam at her home of Burton. Burton, however, has troubles of its own, being beset by Zog's ogres. The Halflings settle in Burton and together they defeat Zog and turn their attention to another threa, Dargem's pirates. Looking for allies against this new threat, Henrietta enlists Boyd, a sentient skeleton and former member of Dargem's crew. Dargem had betrayed and murdered Boyd and now Boyd only exists to enact his vengeance on Dargem. After a tough battle, Henrietta and Boyd are victorious and, as agreed, Henrietta leaves Dargem at Boyd's mercy.
The immediate crises solved, the Halflings work hard to improve Burton. With their help, it becomes a thriving city-state. Several years later, a series of unnatural earthquakes shake the region and Henrietta, now the Scout-Master of Burton, sets off to investigate. When he hears no word from her in several months, Frederick sets off to find his friend. Unexpectedly, he is joined by Kastore (the king of Deyja), who is in Jadame on his own secret purposes. As fate would have it, the "tombs" north of Burton where Henrietta went missing are actually a crashed Ancient starship. As Kastore is looking for a way to restart a Heavenly Forge, he is very interested in this development. While exploring the ship, he educates Frederick on the wider universe, eventually accepting him as his apprentice. After weeks or months of searching, Kastore and Frederick solve the mystery of the earthquakes. The Warlock Agar has been modifying the local Sandworms into the mighty Olgoi-Khorkhoi! When he eventually creates the Matriarch (an Olgoi-Khorkhoi Queen), she wrests control of the worms away from Agar. Now she and her brood rampage through the mountains, destabilizing the whole region. Frederick, Kastore, and Agar, now set off to find and destroy the Matriarch and after more searching find Henrietta fending her off using a salvaged Ancient power core. Together, they defeat the Matriarch and return to Burton, where Kastore quietly confiscates the Ancient technology and encourages Burton into a technological revolution. This revolution leads to the improvement of Frederick's Automatons and the creation of the fearsome Dreadnoughts.
Burton is thriving and Kastore insidious schemes have not yet come to light. Henrietta sets out to explore the nearby Couatl Islands with a new friend Wynona. With the help of Tlamac Hundred Thoughts, they save the Couatls from extinction and defeat Pactal and the evil Nightcrawlers before returning to Burton (now formally the nation of Terra Nova). In her time away, however, Kastore has seized control of Terra Nova, turning it into a dystopian nightmare and declaring the Halflings enemies of the state. Once again the Halflings are forced to flee their home, however this time they commandeer enough forces to attempt to liberate their original homeland, Eeofol.
Their timing for arriving back in Eeofol was fortuitous, coinciding with the last stages of the War of the Blade. While Catherine, Roland, and Gelu attacked Eeofol from the west, the Halflings attacked from the east. Ultimately, the Kreegans were utterly defeated and eradicated from Enroth.
All In
This campaign follows the story of Dargem following his defeat by Henrietta and Boyd up to his capture and imprisonment while searching for the Horn of the Abyss. It serves as an interlude to narratively connect the story of the Halflings to the story of Jeremy and Bidley.
Features
Pirates can be upgraded twice, similar to Green Dragons in Heroes of Might and Magic II.
Factory has access to two tier 7 creatures, both of which can be built in the same town.
- Neutral
 Captains and
  Navigators
 Mercenaries and
  Artificers
- Bulwark heroes (upcoming) - the [Chieftain] (might) and [Elder] (magic)
 Beatrice the Knight (replaces Sylvia on maps without water)
 Giselle the Ranger (replaces Thorgrim by default)
 Ranloo the Death Knight (replaces Galthran by default)
 Kinkeria the Witch (replaces Voy on maps without water)
- Lord Haart has been re-enabled by default and replaces Sir Mullich. The Death Knight version has been renamed Haart Lich.
- See list of heroes for more information.
- Balance changes to Artillery, Ballistics, Eagle Eye, Estates, First Aid, Intelligence, Learning, Logistics, Mysticism, Necromancy, Pathfinding, and Scouting.
- Resistance is disabled by default.
- New skill: Interference.
- Miscellaneous
- Dozens of new map objects.
- Several new artifacts. See list of artifacts for more information.
- Many Creatures and Heroes received updated portraits. See hero portraits and creature portraits for more information.
- Improved Map Editor and Campaign Editor functionality.
- Conflux's native terrain changed to highlands.
- External dwellings now accumulate creatures cumulatively, as long as they're captured.
- Halflings changed from neutral to Factory.
- Various changes to town balance.
- Spell research system.
- New Conflux building: Vault of Ashes.
- New war machine: Cannon.
- New adventure map vehicle: Airship.
- New Keybinds.
- Many bug fixes and graphical improvements.
- Full compatibility with Heroes 3 HD.
- Template Editor.
Maps
Gallery
-

-

-
 Art by Rusha
 -

-

-

-

-

-

-

-
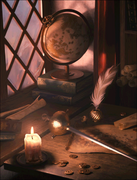 Common Campaign Map Background
 -
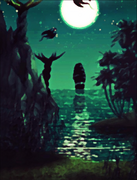 Cove Campaign Map Background 1
 -
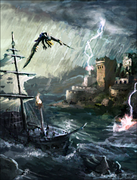
 Cove Campaign Map Background 2
 -
 Cove Campaign Map Background 3
 -
 GOG cover art (full size)
 -
 Polish menu
 -
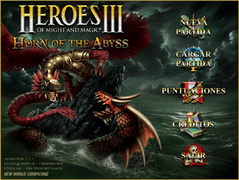 Spanish menu
 -
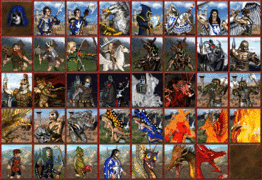 Creature portrait updates
 -
 Hero portrait updates


External Links
- English links
- Documentation (h3hota.com)
- Downloads (h3hota.com)
- GOG.com store page
- Official Heroes Community Thread
- Official Facebook Account
- Official FAQ
- Russian links
- Polish links
- Spanish links
- French links
- German links
- Bulwark
- Factory
- Factory
- Factory Demo trailer
- Factory Demo townscreen
- Wasteland soundtrack by Docent Picolan
- Wasteland stroll
- Wasteland 3D-art by Wit Olszewski
- Kastore's Cabin
- Couatl Evolution
- Couatl in the Jungle
- Factory: the Rally