External dwellings table (HotA): Difference between revisions
Jump to navigation
Jump to search
MurlocAggroB (talk | contribs) (Swapping in the town images for their updated HotA versions.) |
No edit summary |
||
| (11 intermediate revisions by 4 users not shown) | |||
| Line 5: | Line 5: | ||
---- | ---- | ||
{| class=sortable border cellspacing=2 cellpadding=4 style="background-color: | {| class=sortable border cellspacing=2 cellpadding=4 style="background-color:#{{Tan 4}}; text-align:center;" | ||
!+ colspan=9| External dwellings [[Horn of the Abyss|<span style="color:black;">(Horn of the Abyss)</span>]] | !+ colspan=9 style="background-color:#{{Tan 2}}"| External dwellings [[Horn of the Abyss|<span style="color:black;">(Horn of the Abyss)</span>]] | ||
|- | |- style="background-color:#{{Tan 3}}" | ||
! Town | ! Town | ||
! Dwelling | ! Dwelling | ||
| Line 18: | Line 18: | ||
! class=unsortable| Visiting scheme | ! class=unsortable| Visiting scheme | ||
|- | |- | ||
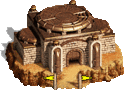
{{External dwellings table row|town=[[File:Adventure Map Castle fort (HotA).gif|x90px|Castle|link=Castle]]||Guardhouse|guards=||unit=[[File:Pikeman portrait (HotA). | {{External dwellings table row|town=[[File:Adventure Map Castle fort (HotA).gif|x90px|Castle|link=Castle]]||Guardhouse|guards=||unit=[[File:Pikeman portrait (HotA).png|Pikeman|link=Pikeman]]<br>[[Pikeman]]|Pikeman|1|14|cost=free|nototal=free}} | ||
{{External dwellings table row|town=[[File:Adventure Map Castle fort (HotA).gif|x90px|Castle|link=Castle]]||Archers' Tower|guards=||Archer|2|9|100|900}} | {{External dwellings table row|town=[[File:Adventure Map Castle fort (HotA).gif|x90px|Castle|link=Castle]]||Archers' Tower|guards=||Archer|2|9|100|900}} | ||
{{External dwellings table row|town=[[File:Adventure Map Castle fort (HotA).gif|x90px|Castle|link=Castle]]||Griffin Tower|guards=||Griffin|3|7|200|1400}} | {{External dwellings table row|town=[[File:Adventure Map Castle fort (HotA).gif|x90px|Castle|link=Castle]]||Griffin Tower|guards=||Griffin|3|7|200|1400}} | ||
| Line 27: | Line 27: | ||
{{External dwellings table row|town=[[File:Adventure Map Rampart fort (HotA).gif|x90px|Rampart|link=Rampart]]||Centaur Stables|guards=||Centaur|1|14|cost=free|nototal=free}} | {{External dwellings table row|town=[[File:Adventure Map Rampart fort (HotA).gif|x90px|Rampart|link=Rampart]]||Centaur Stables|guards=||Centaur|1|14|cost=free|nototal=free}} | ||
{{External dwellings table row|town=[[File:Adventure Map Rampart fort (HotA).gif|x90px|Rampart|link=Rampart]]||Dwarf Cottage|guards=||Dwarf|2|8|120|960}} | {{External dwellings table row|town=[[File:Adventure Map Rampart fort (HotA).gif|x90px|Rampart|link=Rampart]]||Dwarf Cottage|guards=||Dwarf|unit=[[File:Dwarf portrait (HotA).png|Dwarf|link=Dwarf]]<br>[[Dwarf]]|2|8|120|960}} | ||
{{External dwellings table row|town=[[File:Adventure Map Rampart fort (HotA).gif|x90px|Rampart|link=Rampart]]||Homestead|guards=||Wood Elf|3|7|200|1400}} | {{External dwellings table row|town=[[File:Adventure Map Rampart fort (HotA).gif|x90px|Rampart|link=Rampart]]||Homestead|guards=||Wood Elf|unit=[[File:Wood Elf portrait (HotA).png|Wood Elf|link=Wood Elf]]<br>[[Wood Elf]]|3|7|200|1400}} | ||
{{External dwellings table row|town=[[File:Adventure Map Rampart fort (HotA).gif|x90px|Rampart|link=Rampart]]||Enchanted Spring|guards=||Pegasus|4|5|250|1250}} | {{External dwellings table row|town=[[File:Adventure Map Rampart fort (HotA).gif|x90px|Rampart|link=Rampart]]||Enchanted Spring|guards=||Pegasus|4|5|250|1250}} | ||
{{External dwellings table row|town=[[File:Adventure Map Rampart fort (HotA).gif|x90px|Rampart|link=Rampart]]||Dendroid Arches|x9|Dendroid Guard|5|3|350|1050}} | {{External dwellings table row|town=[[File:Adventure Map Rampart fort (HotA).gif|x90px|Rampart|link=Rampart]]||Dendroid Arches|x9|Dendroid Guard|unit=[[File:Dendroid Guard portrait (HotA).png|Dendroid Guard|link=Dendroid Guard]]<br>[[Dendroid Guard]]|5|3|350|1050}} | ||
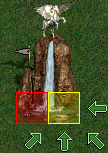
{{External dwellings table row|town=[[File:Adventure Map Rampart fort (HotA).gif|x90px|Rampart|link=Rampart]]||dwelling=[[File:Unicorn Glade-dwelling.gif|Unicorn Glade]]<br>[[File:Unicorn Glade2-dwelling.gif|Unicorn Glade]]<br>[[Unicorn Glade]]||x6|Unicorn|6|2|850|1700|vs=[[File:Unicorn Glade-dwelling (vs).png|border]]<br>[[File:Unicorn Glade2-dwelling (vs).png|border]]}} | {{External dwellings table row|town=[[File:Adventure Map Rampart fort (HotA).gif|x90px|Rampart|link=Rampart]]||dwelling=[[File:Unicorn Glade-dwelling.gif|Unicorn Glade]]<br>[[File:Unicorn Glade2-dwelling.gif|Unicorn Glade]]<br>[[Unicorn Glade]]||x6|Unicorn|6|2|850|1700|vs=[[File:Unicorn Glade-dwelling (vs).png|border]]<br>[[File:Unicorn Glade2-dwelling (vs).png|border]]}} | ||
{{External dwellings table row|town=[[File:Adventure Map Rampart fort (HotA).gif|x90px|Rampart|link=Rampart]]||Dragon Cliffs|x3|Green Dragon|7|1|cost=2400 {{G}}<br>1 {{c}}|nototal=2400 {{G}}<br>1 {{c}}}} | {{External dwellings table row|town=[[File:Adventure Map Rampart fort (HotA).gif|x90px|Rampart|link=Rampart]]||Dragon Cliffs|x3|Green Dragon|7|1|cost=2400 {{G}}<br>1 {{c}}|nototal=2400 {{G}}<br>1 {{c}}}} | ||
| Line 36: | Line 36: | ||
{{External dwellings table row|town=[[File:Adventure Map Tower fort (HotA).gif|x90px|Tower|link=Tower]]||Workshop|guards=||Gremlin|1|16|cost=free|nototal=free}} | {{External dwellings table row|town=[[File:Adventure Map Tower fort (HotA).gif|x90px|Tower|link=Tower]]||Workshop|guards=||Gremlin|1|16|cost=free|nototal=free}} | ||
{{External dwellings table row|town=[[File:Adventure Map Tower fort (HotA).gif|x90px|Tower|link=Tower]]||Parapet|guards=||Stone Gargoyle|2|9|130|1170}} | {{External dwellings table row|town=[[File:Adventure Map Tower fort (HotA).gif|x90px|Tower|link=Tower]]||Parapet|guards=||Stone Gargoyle|2|9|130|1170}} | ||
{{External dwellings table row|town=[[File:Adventure Map Tower fort (HotA).gif|x90px|Tower|link=Tower]]||Golem Factory|guards={{cn|Gold Golem|noname=}}x9<br>{{cn|Diamond Golem|noname=}}x6||unit=[[File:Stone Golem portrait. | {{External dwellings table row|town=[[File:Adventure Map Tower fort (HotA).gif|x90px|Tower|link=Tower]]||Golem Factory|guards={{cn|Gold Golem|noname=}}x9<br>{{cn|Diamond Golem|noname=}}x6||unit=[[File:Stone Golem portrait.png|Stone Golem|link=Stone Golem]]<br>[[Stone Golem]]<br>[[File:Iron Golem portrait.png|Iron Golem|link=Iron Golem]]<br>[[Iron Golem]]<br>{{cn|Gold Golem|noname=}}{{-}}{{cn|Diamond Golem|noname=}}| |3|6|cost=150 {{G}}<br>200 {{g}}|nototal=900 {{g}}<br>1200 {{g}}}} | ||
{{External dwellings table row|town=[[File:Adventure Map Tower fort (HotA).gif|x90px|Tower|link=Tower]]||Mage Tower|guards=||Mage|4|4|350|1400}} | {{External dwellings table row|town=[[File:Adventure Map Tower fort (HotA).gif|x90px|Tower|link=Tower]]||Mage Tower|guards=||Mage|4|4|350|1400}} | ||
{{External dwellings table row|town=[[File:Adventure Map Tower fort (HotA).gif|x90px|Tower|link=Tower]]||Altar of Wishes|x9|Genie|5|3|550|1650}} | {{External dwellings table row|town=[[File:Adventure Map Tower fort (HotA).gif|x90px|Tower|link=Tower]]||Altar of Wishes|x9|Genie|5|3|550|1650}} | ||
| Line 68: | Line 68: | ||
{{External dwellings table row|town=[[File:Adventure Map Stronghold fort (HotA).gif|x90px|Stronghold|link=Stronghold]]||Goblin Barracks|guards=||Goblin|1|15|cost=free|nototal=free}} | {{External dwellings table row|town=[[File:Adventure Map Stronghold fort (HotA).gif|x90px|Stronghold|link=Stronghold]]||Goblin Barracks|guards=||Goblin|1|15|cost=free|nototal=free}} | ||
{{External dwellings table row|town=[[File:Adventure Map Stronghold fort (HotA).gif|x90px|Stronghold|link=Stronghold]]||Wolf Pen|guards=||Wolf Rider|2|9|100|900}} | {{External dwellings table row|town=[[File:Adventure Map Stronghold fort (HotA).gif|x90px|Stronghold|link=Stronghold]]||Wolf Pen|guards=||Wolf Rider|2|9|100|900}} | ||
{{External dwellings table row|town=[[File:Adventure Map Stronghold fort (HotA).gif|x90px|Stronghold|link=Stronghold]]||Orc Tower|guards=||unit=[[File:Orc portrait (HotA). | {{External dwellings table row|town=[[File:Adventure Map Stronghold fort (HotA).gif|x90px|Stronghold|link=Stronghold]]||Orc Tower|guards=||unit=[[File:Orc portrait (HotA).png|Orc|link=Orc]]<br>[[Orc]]|Orc|3|7|150|1050}} | ||
{{External dwellings table row|town=[[File:Adventure Map Stronghold fort (HotA).gif|x90px|Stronghold|link=Stronghold]]||Ogre Fort|guards=||Ogre|4|4|300|1200}} | {{External dwellings table row|town=[[File:Adventure Map Stronghold fort (HotA).gif|x90px|Stronghold|link=Stronghold]]||Ogre Fort|guards=||Ogre|4|4|300|1200}} | ||
{{External dwellings table row|town=[[File:Adventure Map Stronghold fort (HotA).gif|x90px|Stronghold|link=Stronghold]]||Cliff Nest|x9|Roc|5|3|600|1800}} | {{External dwellings table row|town=[[File:Adventure Map Stronghold fort (HotA).gif|x90px|Stronghold|link=Stronghold]]||Cliff Nest|x9|Roc|5|3|600|1800}} | ||
| Line 87: | Line 87: | ||
{{External dwellings table row|town=[[File:Adventure Map Conflux fort (HotA).gif|x90px|Conflux|link=Conflux]]||Altar of Water|guards=||Water Elemental|3|6|300|1800|vs=[[File:Altar of Water (HotA)-dwelling (vs).png|Altar of Water|link=Altar of Water]]}} | {{External dwellings table row|town=[[File:Adventure Map Conflux fort (HotA).gif|x90px|Conflux|link=Conflux]]||Altar of Water|guards=||Water Elemental|3|6|300|1800|vs=[[File:Altar of Water (HotA)-dwelling (vs).png|Altar of Water|link=Altar of Water]]}} | ||
{{External dwellings table row|town=[[File:Adventure Map Conflux fort (HotA).gif|x90px|Conflux|link=Conflux]]||dwelling=[[File:Water Elemental Conflux (HotA)-dwelling.gif|Water Elemental Conflux]]<br>[[Water Elemental Conflux]]|Water Elemental Conflux|guards=||Water Elemental|3|6|300|1800|vs=[[File:Water Elemental Conflux (HotA)-dwelling (vs).png|Water Elemental Conflux|link=Water Elemental Conflux]]}} | {{External dwellings table row|town=[[File:Adventure Map Conflux fort (HotA).gif|x90px|Conflux|link=Conflux]]||dwelling=[[File:Water Elemental Conflux (HotA)-dwelling.gif|Water Elemental Conflux]]<br>[[Water Elemental Conflux]]|Water Elemental Conflux|guards=||Water Elemental|3|6|300|1800|vs=[[File:Water Elemental Conflux (HotA)-dwelling (vs).png|Water Elemental Conflux|link=Water Elemental Conflux]]}} | ||
{{External dwellings table row|town=[[File:Adventure Map Conflux fort (HotA).gif|x90px|Conflux|link=Conflux]]||Altar of Fire|guards=||unit=[[File:Fire Elemental portrait (HotA). | {{External dwellings table row|town=[[File:Adventure Map Conflux fort (HotA).gif|x90px|Conflux|link=Conflux]]||Altar of Fire|guards=||unit=[[File:Fire Elemental portrait (HotA).png|Fire Elemental|link=Fire Elemental]]<br>[[Fire Elemental]]|Fire Elemental|4|5|350|1750|vs=[[File:Altar of Fire (HotA)-dwelling (vs).png|Altar of Fire|link=Altar of Fire]]}} | ||
{{External dwellings table row|town=[[File:Adventure Map Conflux fort (HotA).gif|x90px|Conflux|link=Conflux]]||dwelling=[[File:Fire Elemental Conflux (HotA)-dwelling.gif|Fire Elemental Conflux]]<br>[[Fire Elemental Conflux]]|Fire Elemental Conflux|guards=||unit=[[File:Fire Elemental portrait (HotA). | {{External dwellings table row|town=[[File:Adventure Map Conflux fort (HotA).gif|x90px|Conflux|link=Conflux]]||dwelling=[[File:Fire Elemental Conflux (HotA)-dwelling.gif|Fire Elemental Conflux]]<br>[[Fire Elemental Conflux]]|Fire Elemental Conflux|guards=||unit=[[File:Fire Elemental portrait (HotA).png|Fire Elemental|link=Fire Elemental]]<br>[[Fire Elemental]]|Fire Elemental|4|5|350|1750|vs=[[File:Fire Elemental Conflux (HotA)-dwelling (vs).png|Fire Elemental Conflux|link=Fire Elemental Conflux]]}} | ||
{{External dwellings table row|town=[[File:Adventure Map Conflux fort (HotA).gif|x90px|Conflux|link=Conflux]]||Altar of Earth|x12|Earth Elemental|5|4|400|1600|vs=[[File:Altar of Earth (HotA)-dwelling (vs).png|Altar of Earth|link=Altar of Earth]]}} | {{External dwellings table row|town=[[File:Adventure Map Conflux fort (HotA).gif|x90px|Conflux|link=Conflux]]||Altar of Earth|x12|Earth Elemental|5|4|400|1600|vs=[[File:Altar of Earth (HotA)-dwelling (vs).png|Altar of Earth|link=Altar of Earth]]}} | ||
{{External dwellings table row|town=[[File:Adventure Map Conflux fort (HotA).gif|x90px|Conflux|link=Conflux]]||dwelling=[[File:Earth Elemental Conflux (HotA)-dwelling.gif|Earth Elemental Conflux]]<br>[[Earth Elemental Conflux]]|Earth Elemental Conflux|x12|Earth Elemental|5|4|400|1600|vs=[[File:Earth Elemental Conflux (HotA)-dwelling (vs).png|Earth Elemental Conflux|link=Earth Elemental Conflux]]}} | {{External dwellings table row|town=[[File:Adventure Map Conflux fort (HotA).gif|x90px|Conflux|link=Conflux]]||dwelling=[[File:Earth Elemental Conflux (HotA)-dwelling.gif|Earth Elemental Conflux]]<br>[[Earth Elemental Conflux]]|Earth Elemental Conflux|x12|Earth Elemental|5|4|400|1600|vs=[[File:Earth Elemental Conflux (HotA)-dwelling (vs).png|Earth Elemental Conflux|link=Earth Elemental Conflux]]}} | ||
| Line 103: | Line 103: | ||
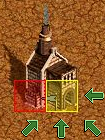
{{External dwellings table row|town=[[File:Adventure Map Cove fort (HotA).gif|x90px|Cove|link=Cove]]|||dwelling=[[File:Maelstrom-dwelling.gif|Maelstrom]]<br>[[File:Maelstrom2-dwelling.gif|Maelstrom]]<br>[[Maelstrom]]|x3|Sea Serpent|7|1|cost=2200 {{G}}<br>1 {{s}}||nototal=2200 {{G}}<br>1 {{s}}||vs=[[File:Maelstrom-dwelling (vs).png|border]]<br>[[File:Maelstrom2-dwelling (vs).png|border]]|anchor=Maelstrom}} | {{External dwellings table row|town=[[File:Adventure Map Cove fort (HotA).gif|x90px|Cove|link=Cove]]|||dwelling=[[File:Maelstrom-dwelling.gif|Maelstrom]]<br>[[File:Maelstrom2-dwelling.gif|Maelstrom]]<br>[[Maelstrom]]|x3|Sea Serpent|7|1|cost=2200 {{G}}<br>1 {{s}}||nototal=2200 {{G}}<br>1 {{s}}||vs=[[File:Maelstrom-dwelling (vs).png|border]]<br>[[File:Maelstrom2-dwelling (vs).png|border]]|anchor=Maelstrom}} | ||
{{External dwellings table row|town=[[File:Adventure Map Factory fort (HotA).gif|x90px|Factory|link=Factory]]||Halfling Adobe|guards=||unit=[[File:Halfling (Factory) portrait. | {{External dwellings table row|town=[[File:Adventure Map Factory fort (HotA).gif|x90px|Factory|link=Factory]]||dwelling=[[File:Halfling Adobe-dwelling.png|Halfling Adobe]]<br>[[Halfling Adobe]]|Halfling Adobe|guards=||unit=[[File:Halfling (Factory) portrait.png|Halfling (Factory)|link=Halfling (Factory)]]<br>[[Halfling (Factory)|Halfling]]||1|15|cost=free| |nototal=free|}} | ||
{{External dwellings table row|town=[[File:Adventure Map Factory fort (HotA).gif|x90px|Factory|link=Factory]]||Thatched Hut|guards=||unit=[[File:Halfling (Factory) portrait. | {{External dwellings table row|town=[[File:Adventure Map Factory fort (HotA).gif|x90px|Factory|link=Factory]]||Thatched Hut|guards=||unit=[[File:Halfling (Factory) portrait.png|Halfling (Factory)|link=Halfling (Factory)]]<br>[[Halfling (Factory)|Halfling]]||1|15|cost=free| |nototal=free|vs=[[File:Thatched Hut (HotA)-dwelling (vs).png|Thatched Hut|link=Thatched Hut]]}} | ||
{{External dwellings table row|town=[[File:Adventure Map Factory fort (HotA).gif|x90px|Factory|link=Factory]]||Foundry|guards=| |Mechanic|2|8|cost=140 {{G}}| |nototal=1120 {{G}}|}} | {{External dwellings table row|town=[[File:Adventure Map Factory fort (HotA).gif|x90px|Factory|link=Factory]]||Foundry|guards=| |Mechanic|2|8|cost=140 {{G}}| |nototal=1120 {{G}}|}} | ||
{{External dwellings table row|town=[[File:Adventure Map Factory fort (HotA).gif|x90px|Factory|link=Factory]]||Ranch|guards=| |Armadillo|3|6|cost=200 {{G}}| |nototal=1200 {{G}}|}} | {{External dwellings table row|town=[[File:Adventure Map Factory fort (HotA).gif|x90px|Factory|link=Factory]]||Ranch|guards=| |Armadillo|3|6|cost=200 {{G}}| |nototal=1200 {{G}}|}} | ||
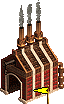
{{External dwellings table row|town=[[File:Adventure Map Factory fort (HotA).gif|x90px|Factory|link=Factory]]||Manufactory|guards=| |Automaton|4|5|cost=350 {{G}}| |nototal=1750 {{G}}|}} | {{External dwellings table row|town=[[File:Adventure Map Factory fort (HotA).gif|x90px|Factory|link=Factory]]||Manufactory|guards=| |Automaton|4|5|cost=350 {{G}}| |nototal=1750 {{G}}|}} | ||
{{External dwellings table row|town=[[File:Adventure Map Factory fort (HotA).gif|x90px|Factory|link=Factory]]||Catacombs|guards={{cn|Sandworm|noname=|image=Sandworm}}x9| |Sandworm|5|3|cost=575 {{G}}| |nototal=1725 {{G}}|}} | {{External dwellings table row|town=[[File:Adventure Map Factory fort (HotA).gif|x90px|Factory|link=Factory]]||Catacombs|guards={{cn|Sandworm|noname=|image=Sandworm}}x9| |Sandworm|5|3|cost=575 {{G}}| |nototal=1725 {{G}}|}} | ||
{{External dwellings table row|town=[[File:Adventure Map Factory fort (HotA).gif|x90px|Factory|link=Factory]]||Watchtower|guards={{cn|Gunslinger|noname=|image=Gunslinger}}x6| |Gunslinger|6|2|cost=800 {{G}}| |nototal=1600 {{G}}|}} | {{External dwellings table row|town=[[File:Adventure Map Factory fort (HotA).gif|x90px|Factory|link=Factory]]||dwelling=[[File:Watchtower-dwelling.png|Watchtower]]<br>[[Watchtower]]|Watchtower|guards={{cn|Gunslinger|noname=|image=Gunslinger}}x6| |Gunslinger|6|2|cost=800 {{G}}| |nototal=1600 {{G}}|}} | ||
{{External dwellings table row|town=[[File:Adventure Map Factory fort (HotA).gif|x90px|Factory|link=Factory]]||Serpentarium|guards={{cn|Couatl|noname=|image=Couatl}}x3| |Couatl|7|1|cost=2000 {{G}}| |nototal=2000 {{G}}|}} | {{External dwellings table row|town=[[File:Adventure Map Factory fort (HotA).gif|x90px|Factory|link=Factory]]||dwelling=[[File:Serpentarium-dwelling.png|Serpentarium]]<br>[[Serpentarium]]|Serpentarium|guards={{cn|Couatl|noname=|image=Couatl}}x3| |Couatl|7|1|cost=2000 {{G}}| |nototal=2000 {{G}}|}} | ||
{{External dwellings table row|town=[[File:Adventure Map Factory fort (HotA).gif|x90px|Factory|link=Factory]]||Gantry|guards={{cn|Dreadnought|noname=|image=Dreadnought}}x3| |Dreadnought|7|1|cost=2500 {{G}}<br>1 {{c}}| |nototal=2500 {{G}}<br> 1 {{c}}|}} | {{External dwellings table row|town=[[File:Adventure Map Factory fort (HotA).gif|x90px|Factory|link=Factory]]||dwelling=[[File:Gantry-dwelling.png|Gantry]]<br>[[Gantry]]|Gantry|guards={{cn|Dreadnought|noname=|image=Dreadnought}}x3| |Dreadnought|7|1|cost=2500 {{G}}<br>1 {{c}}| |nototal=2500 {{G}}<br> 1 {{c}}|}} | ||
{{External dwellings table row|town={{town|Neutral|noname=}}||Hovel|guards=||Peasant|1|25|cost=free|nototal=free}} | {{External dwellings table row|town={{town|Neutral|noname=}}||Hovel|guards=||Peasant|1|25|cost=free|nototal=free}} | ||
| Line 120: | Line 120: | ||
{{External dwellings table row|town={{town|Neutral|noname=}}||Tomb of Curses|guards=||Mummy|3|7|300|2100}} | {{External dwellings table row|town={{town|Neutral|noname=}}||Tomb of Curses|guards=||Mummy|3|7|300|2100}} | ||
{{External dwellings table row|town={{town|Neutral|noname=}}||Wineyard|guards=||Satyr|4|4|300|1200}} | {{External dwellings table row|town={{town|Neutral|noname=}}||Wineyard|guards=||Satyr|4|4|300|1200}} | ||
{{External dwellings table row|town={{town|Neutral|noname=}}||Treetop Tower|guards=||Sharpshooter|4|4|400|1600}} | {{External dwellings table row|town={{town|Neutral|noname=}}||Treetop Tower||guards=|Sharpshooter|unit=[[File:Sharpshooter portrait (HotA).png|Sharpshooter|link=Sharpshooter]]<br>[[Sharpshooter]]|4|4|400|1600}} | ||
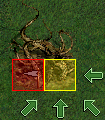
{{External dwellings table row|town={{town|Neutral|noname=}}||Troll Bridge||guards={{cn|Troll|noname=|image=Troll (HotA)}}x9|Troll|unit=[[File:Troll portrait (HotA). | {{External dwellings table row|town={{town|Neutral|noname=}}||Troll Bridge||guards={{cn|Troll|noname=|image=Troll (HotA)}}x9|Troll|unit=[[File:Troll portrait (HotA).png|Troll|link=Troll]]<br>[[Troll]]|5|3|500|1500}} | ||
{{External dwellings table row|town={{town|Neutral|noname=}}||Ziggurat|x9|Fangarm|5|3|600|1800}} | {{External dwellings table row|town={{town|Neutral|noname=}}||Ziggurat|x9|Fangarm|5|3|600|1800}} | ||
{{External dwellings table row|town={{town|Neutral|noname=}}||Golem Factory|guards={{cn|Gold Golem|noname=}}x9<br>{{cn|Diamond Golem|noname=}}x6||unit={{-}}{{cn|Stone Golem|noname=}}{{-}}{{cn|Iron Golem|noname=}}<br>[[File:Gold Golem portrait. | {{External dwellings table row|town={{town|Neutral|noname=}}||Golem Factory|guards={{cn|Gold Golem|noname=}}x9<br>{{cn|Diamond Golem|noname=}}x6||unit={{-}}{{cn|Stone Golem|noname=}}{{-}}{{cn|Iron Golem|noname=}}<br>[[File:Gold Golem portrait.png|Gold Golem|link=Gold Golem]]<br>[[Gold Golem]]<br>[[File:Diamond Golem portrait.png|Diamond Golem|link=Diamond Golem]]<br>[[Diamond Golem]]| |level=5<br>6| |growth=3<br>+2|cost=500 {{g}}<br>750 {{g}}|nototal=1500 {{g}}<br>1500 {{g}}}} | ||
{{External dwellings table row|town={{town|Neutral|noname=}}||Enchanter's Hollow|x6|Enchanter|6|2|750|1500}} | {{External dwellings table row|town={{town|Neutral|noname=}}||Enchanter's Hollow|x6|Enchanter|6|2|750|1500}} | ||
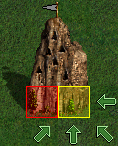
{{External dwellings table row|town={{town|Neutral|noname=}}||Magic Forest|x3|Faerie Dragon|7|1|cost=10000 {{G}}<br>8 {{gem}}|nototal=10000 {{G}}<br>8 {{gem}}}} | {{External dwellings table row|town={{town|Neutral|noname=}}||Magic Forest||guards={{cn|Faerie Dragon|noname=|image=Faerie Dragon (HotA)}}x3|Faerie Dragon|unit=[[File:Faerie Dragon portrait (HotA).png|Faerie Dragon|link=Faerie Dragon]]<br>[[Faerie Dragon]]|7|1|cost=10000 {{G}}<br>8 {{gem}}|nototal=10000 {{G}}<br>8 {{gem}}}} | ||
{{External dwellings table row|town={{town|Neutral|noname=}}||Sulfurous Lair|x3|Rust Dragon|7|1|cost=15000 {{G}}<br>14 {{s}}|nototal=15000 {{G}}<br>14 {{s}}}} | {{External dwellings table row|town={{town|Neutral|noname=}}||Sulfurous Lair|x3|Rust Dragon|7|1|cost=15000 {{G}}<br>14 {{s}}|nototal=15000 {{G}}<br>14 {{s}}}} | ||
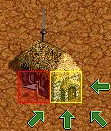
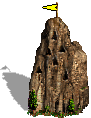
{{External dwellings table row|town={{town|Neutral|noname=}}||dwelling=[[File:Crystal Cavern-dwelling.gif|Crystal Cave]]<br>[[Crystal Cave]]|Crystal Cavern|x3|Crystal Dragon|7|1|cost=20000 {{G}}<br>10 {{c}}|nototal=20000 {{G}}<br>10 {{c}}}} | {{External dwellings table row|town={{town|Neutral|noname=}}||dwelling=[[File:Crystal Cavern-dwelling.gif|Crystal Cave]]<br>[[Crystal Cave]]|Crystal Cavern|x3|Crystal Dragon|7|1|cost=20000 {{G}}<br>10 {{c}}|nototal=20000 {{G}}<br>10 {{c}}}} | ||
Latest revision as of 21:44, 29 October 2024
See also:
See also:[edit | hide]


.png)
.png)


-dwelling.gif)


-dwelling.gif)


-dwelling_(vs).png)


-dwelling.gif)


-dwelling.gif)


-dwelling.gif)


-dwelling.gif)
-dwelling.gif)

-dwelling.gif)


.png)
.png)


.png)
.png)